In this Topic Hide
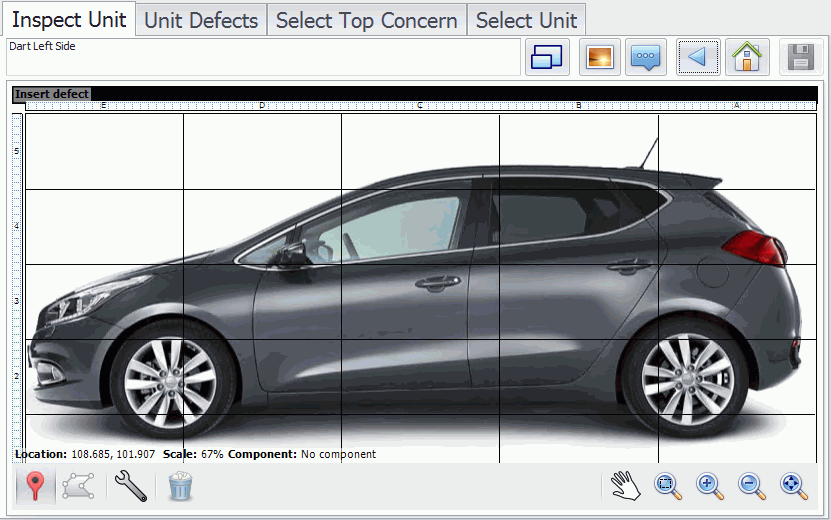
Raster views are 2D views that allow you to precisely highlight where the defect has been found.
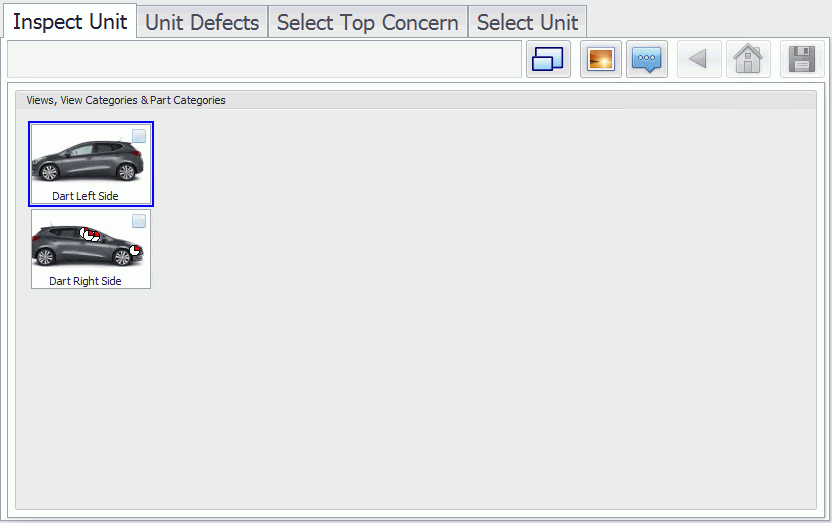
1. Select the View on which you want to record a concern.
The selected view will be shown as follows:
Components on which defects can be assigned may be highlighted.
For information on highlighting components in View Composer see here.
You can only mark a defect on active components. The cursor changes
to a cross hair ( ) when you
are over an active component.
) when you
are over an active component.
2. Click on the Component at the defect location.
The concern selection window opens.
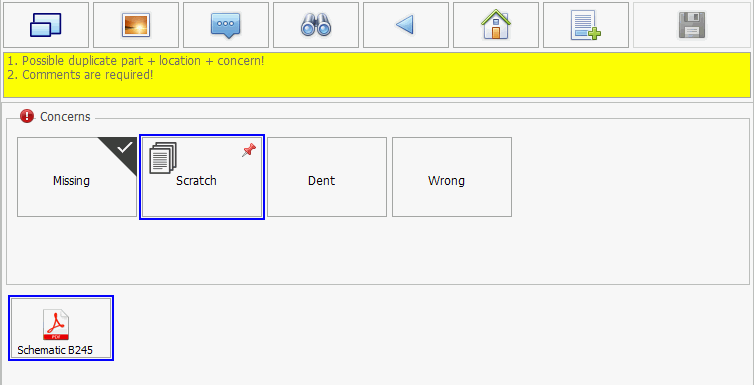
If there are documents associated to a concern then the document icon
( ) will be shown in the corner of it.
Click on the icon to show a list of the associated documents and then
click on the document to open it.
) will be shown in the corner of it.
Click on the icon to show a list of the associated documents and then
click on the document to open it.
3. Select a Concern.
A warning is displayed if the part/location/concern matches an existing defect on the unit.
The rank selection window opens.
4. Select a Rank.
The responsible area and responsible cell selection window opens.
5. Select a Responsible Area and Responsible Cell.
6. Enter any required comments relating to the defect.
7. Enter a Quantity. This is used when there are multiple defects of the same type on a part. By default the value is 1.
8. Enter a track number. This is a unique identifier for the defect.
If the Reference Documents control is present (see here) you can view images and guidelines, associated to the selected concern, by clicking on their images. These will help you to correctly fill in the form.
9. Click OK to apply the concern and return to the View screen.
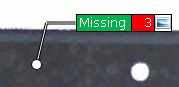
For a description of how the defect appears on the View screen refer to the Defect Flags section.
An optional warning message can be configured to display on the screen if the same concern is entered more than once on the same part and location.
Sometimes, a defect covers a larger area than can be conveyed by a single defect marking. In these cases, Data Collect allows you to draw a shape on the part to surround the entire defect area.
1. Select the view on which you want to mark a defect area.
2. Enable the Marked
Area button ( ).
).
The cursor changes to a pencil icon.
3. Click and drag to draw an outline around the area.
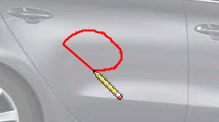
4. When finished outlining the area, release the mouse/pointer and enter the defect information (see here).
The area defect is displayed with the callout marker pointing to the center of the marked or traced area.
If the area covers more than one part then only one part will be given a defect. This will be the part closest to the center of the area.
If the defect area you mark crosses multiple components, you will only be shown a list of concerns that contains common concerns between the components. For example, if the concern "Damaged" is available for all components, that concern will appear in the list.
When you have added a multi-component area defect, a defect flag is added to each affected part, increasing the total number of defects by the number of components you have included in the area.
Sometimes a view is displayed with a grid. This grid supplies coordinates which can be used in reports. The presence and use of grids is specified in View Composer where you can specify the numbers of rows and columns and can determine the appearance of the labels. From an inspection standpoint, the presence of a grid does not affect the way you mark concerns.
For information on how to create grids in View Composer see here.

If a defect has an image associated to it this will be highlighted by a picture icon at the end of the defect flag.