In this topic: Hide
![]() The Managed Reports
page allows you to create, modify, or delete Managed Reports.
The Managed Reports
page allows you to create, modify, or delete Managed Reports.
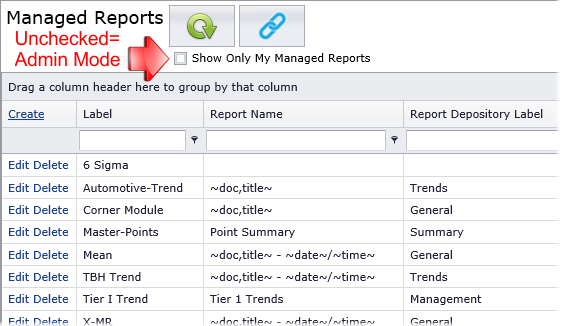
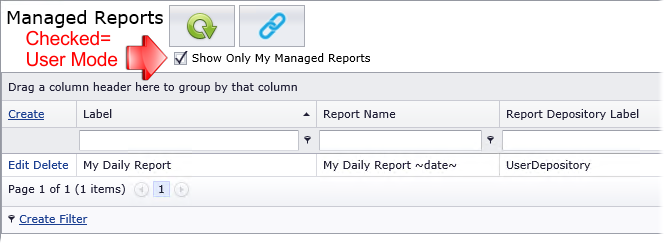
If you have the Document Manager privilege, you will see additional functionality to the standard user page for Managed Reports. In addition to creating Managed Reports for yourself, you can also create Manage Reports for all CM4D Web users in the Site and for use with CM4D Scheduler. The two 'modes' of this page, Admin and User, each cache their grid layout, sorting, grouping, etc. independently.
You can customize this page by sorting, grouping or filtering. See the topic CM4D Web Interface for more information on customizing the CM4D Web interface.
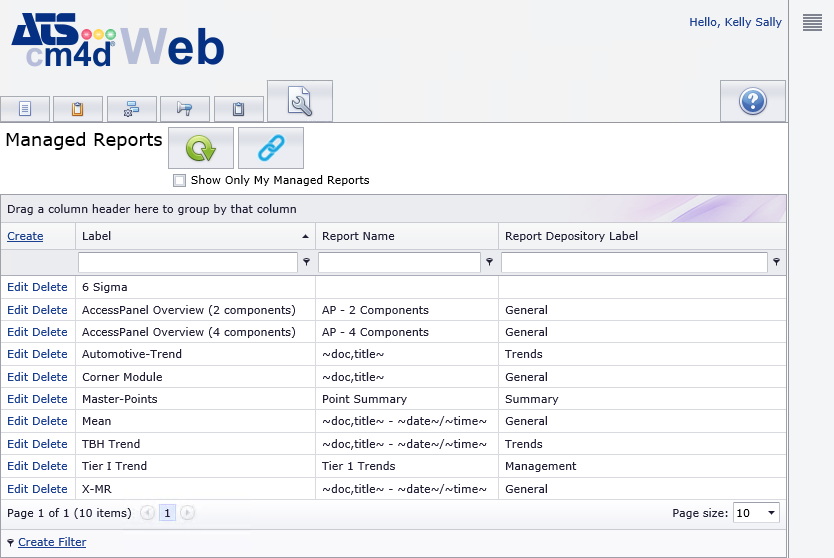
· Label - the name of the Managed Report.
· Report Name - the name of the generated Report (PDF).
· Report Depository Label - the label of the Report Depository assigned to the Managed Report. An empty field is valid if the Report is only printed as a Web Report.
If you want to create Managed Reports that will be accessible to all CM4D Web user for printing Web Reports, the Show Only My Managed Reports box below the Refresh and Share Link buttons must be unchecked.
1. To make a new Managed Report, click Create.
2. Enter the information in the fields and select one or more SheetSets.
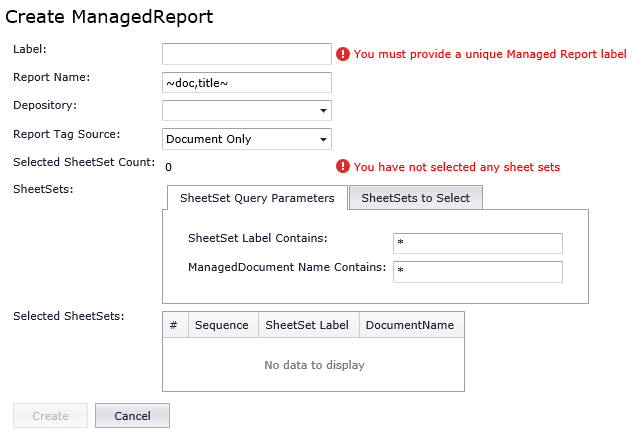
a. Enter a Label.
b. Enter a Report Name. This can be a string, CM4D variables, or a combination of both. See here for more on report names.
i. For reports that will be generated with CM4D Scheduler, this required. Managed Reports with blank Report Names will not appear in the list of Managed Reports in Scheduler.
ii. For reports that will only be generated in CM4D Web, this is optional. If you leave this blank, Web Report will be created with a default name in this format: 'username_date_time'.
i. For reports that will be generated with CM4D Scheduler, this required.
ii. For reports that will be only generated in CM4D Web, this is optional. If a Depository is set (when needed for Scheduler), it will be ignored as all Web Reports are automatically saved to individual folders on the server for each logged on User ID.
d. Select a Report Tag Source. Click
here for Source definitions.
e. In the SheetSet Query Parameters tab, enter text strings to search for specific SheetSets or Managed Documents.
f. Click the SheetSets to Select tab.
i. Select the SheetSet(s) that you want to include in the Managed Report.

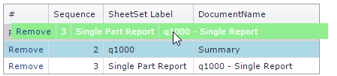
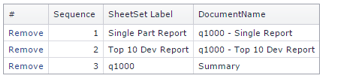
ii. Optionally, you can adjust the Sequence to change the print order of the SheetSets as they will appear in the final PDF report.
The Thumbnail used for the Managed Report is taken from the first SheetSet (Sequence 1) in the Managed Report.
(1) In the Selected SheetSets region, click on the SheetSet that you want to move, then drag and drop it to the location you want it to appear.
|
|
|
3. Click Create to finish creating the new Managed Report.
1. To modify an existing Managed Report, click Edit in the row of the report that you want to change.

See the section above on creating a Managed Report for more information on the various fields.
2. Modify the areas that you want to change.
a. Remove SheetSets.
b. Add SheetSets.
c. Change the Order of the SheetSets.
3. Click Update.
To remove a Managed Report from the database, click Delete in the row of the report that you want to remove. That Managed Report will no longer appear on the Templates page for users, but any existing PDFs creating using that Managed Report will remain on the file server until manually deleted by an Administrator.
Deleting a Managed Report does not unmanage the SheetSets it contained. These will remain in the list of available SheetSets to add to other Managed Reports until they are manually unmanaged from the CM4D document.
If you want to create your own personal Managed Reports, you can switch to the User mode for this page by enabling the Show Only My Subscribed Events check box below the Refresh and Share Link buttons.
Once this check box is enabled, the page functions the same way it does for standard web users. See the topic Managed Reports to see the steps for creating your own Managed Reports.