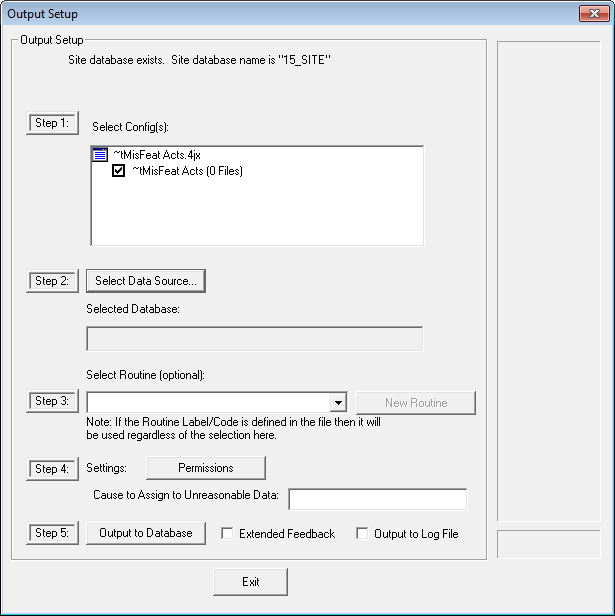
Each step of the Output to Database dialog contains settings that may affect how DataSmith sends your data to a database.
Choose which Config(s) to output. By default, all available Configs will be selected. If a configuration is listed which you do not want put into the database, click the check box next to the Config label to remove the check.
A Managed DataSource may be chosen.
Displays the label of the selected Database.
You may select the routine. However, the selection of a DataSource and a routine in steps two and three may be overridden by the settings within your DataSmith file. If Routine Codes are used in your DataSmith file, please see the topic Routine Codes.
Allows you to create a New Routine in the Database. Requires the appropriate privileges.
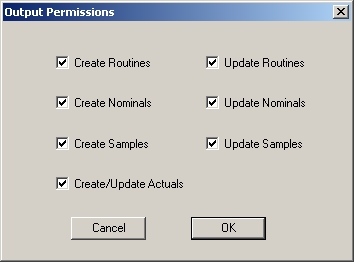
Click the Permissions button in order to select what type of changes you want to allow to be made to the database. All seven options are enabled by default.
If you are using a Site Database with Authentication, then the user must also have the corresponding Data Manager privileges in order to make changes to the database. See here for more information on Site privileges.
DataSmith may create Routines in the Database while files are being processed. DataSmith will detect if the Routine exists, and if it does not, it will create the Routine if the Can Create Routine check box is selected. If the Routine already exists, DataSmith will update the Routine if Can Update Routine is selected.
Allowing permission to Create Routines, however, is not recommended for most Batch Jobs.
DataSmith may update Routines in the Database while files are being processed. DataSmith will detect if the Routine exists, and if it does not, it will create the Routine if Can Create Routine is selected. If the Routine already exists, DataSmith will update the Routine.
DataSmith may create or Nominal information in the Database while files are being processed. DataSmith will detect if the Nominal exists, and whether or not it has changed.
DataSmith may update Nominal information in the Database while files are being processed. DataSmith will detect if the Nominal exists, and whether or not it has changed.
DataSmith may create Sample information in the Database while files are being processed. DataSmith will detect if the Sample exists, and whether or not it has changed.
DataSmith may update Sample information in the Database while files are being processed. DataSmith will detect if the Sample exists, and whether or not it has changed.
DataSmith may create or update Actual information in the Database while files are being processed, depending on whether this permission is selected. DataSmith will detect if the Actual exists, and whether or not it has changed. DataSmith can only Create or Update an Actual; one operation cannot be performed separately from the other.
You can assign an existing cause to unreasonable data by entering a valid cause label in the Cause to Assign to Unreasonable Data field. If you enter a valid label, causes will be assigned where values exceed reasonable limits. If you leave this field empty, or enter a bad cause label, no causes will be assigned. Cause Labels can also be assigned using DataSmith Batch.
A feature has reasonable limits (i.e. both a high and a low reasonable limit). When reading in each actual, the actual is checked to see if it is between the high and low values. If it is not between the limits, then the value is considered not reasonable, and the cause will be assigned.
If reasonable limits have not been defined for that actual's feature characteristic, no comparison can be made as to what is reasonable or unreasonable, so causes cannot be assigned.
When processing files in DataSmith, feature characteristics are not calculated. For example, if there are reasonable limits for a Position characteristic, but the data file only contains X, Y, and Z characteristic values, a check for reasonable limits cannot be performed. For this case, the X, Y, and Z characteristics in the data file should have reasonable limits.
Click the Output to Database button to send your data to the database. You can also choose to receive Extended Feedback or Output to Log File by checking the corresponding check boxes.
Selecting Extended Feedback in the Output to Database dialog will give a complete record of the output in the summary window. You can also view this information in the DataSmith Log File if Output to Log File is selected.
If Output to Log File is selected in the Output Setup dialog, DataSmith will send records of the files you processed to the DataSmith.log file. It will append new information to the end of the log file as files are processed with DataSmith. You can also view this information in the DataSmith Output Summary. The log file will contain information about all of the outputs during the current session of DataSmith. The summary will only contain information about the most recent output.
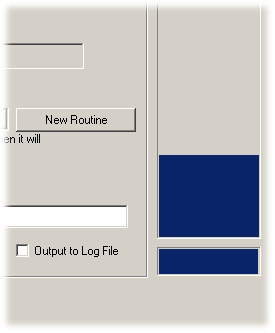
The Progress Meter located on the right side of the Output Setup dialog will indicate the progress of the data entry into the database. The progress meter only measures the pre-processing of data. Once data is being put into the Database, the meter will be to the top and will stay there until DataSmith completes the output to the database.
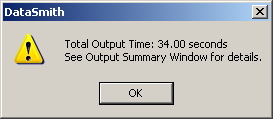
When the output has successfully completed, a dialog appears that shows the Total Output time.
The Output Summary tab contains records of the most recent output. The summary will contain a record of any errors which occurred during processing. The summary will contain the date and time of processing, name of the data file, document, and Config. It will also contain a record of the number of routines, features and samples which were created or updated during processing. The information contained in the Output Summary will only be written to the log file if you select the Output to Log File in the Output to Database dialog.
Why is my data not showing up in the database?
One of the simplest ways to prevent problems when putting your data in a database is to check that all of your associations are correct. Make sure you have the required associations for your data.
For example, if you do not have a characteristic with an association of Feature Label, your data probably will not reach your database, because DataSmith will not know where to put it.