Each menu lists several related selections, and each selection performs a specific action. The menu bar can be docked to any of the four outer edges of the User Interface, or you can click and drag the menu bar to float anywhere on the interface as an independent container (shown below).
![]()
A menu can be opened by clicking on it, or by pressing the Alt key plus the letter that is underlined in the menu's title. For example, to open the File Menu, you would press Alt + F on the keyboard. Choose a menu selection by clicking on it, pressing its underlined letter, or by using the arrow keys to highlight it; then pressing Enter. Menus and selections that are not available for use in DataUtility will appear in gray text.
The File menu contains options for printing, export and access to a read-only version of the Session Properties dialog.

DataUtility allows you to print the results of your search as it is viewed in the report display region of the interface. The Print option will send your report display directly to the printer as per your Print Setup settings. |
||
Print Preview |
Standard Windows operations. |
|
Print Setup |
Standard Windows operations. |
|
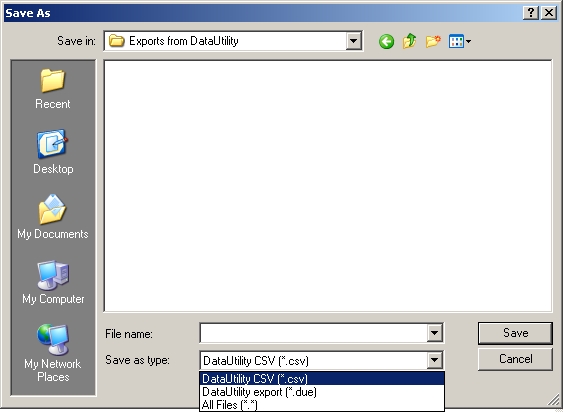
Export |
The Export option allows you to export the results display region in a DataUtility CSV (.csv - comma separated value) or DataUtility Export (.due - tab delimited) format. DataUtility CSV is the default format.
|
|
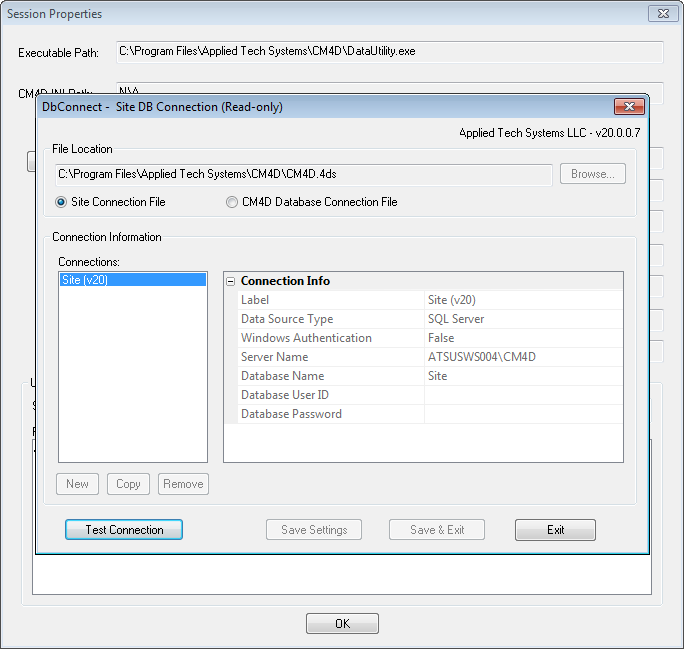
The Session Properties dialog contains read-only information regarding your DataSource Connection and User Privileges. |
||
|
View Info |
Click the View button to open a read-only version of the CM4D DB Connections dialog.
|
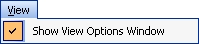
The View menu has one option for toggling the View Options Window. This
windows can also be closed by clicking the  in the top
right-hand corner of the pane region. See the topic Advanced
Features for further information on repositioning and displaying window
regions in DataUtility.
in the top
right-hand corner of the pane region. See the topic Advanced
Features for further information on repositioning and displaying window
regions in DataUtility.
The Report Control menu is comprised of several features for customizing report display.
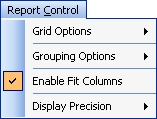
Grid Options |
The Grid Options menu can be used to modify the grid line style and color. |
||
Grid Color |
· Black · Blue · Red · Default |
||
Grid Line Style |
Horizontal |
· No Grid Lines · Small Dots · Large Dots · Dashes · Solid |
|
Vertical |
|||
Grouping Options |
The Grouping Options menu contains the same controls as the View Options Window for enabling grouping and alternating between Quick Load options. |
||
Enable Fit Columns will proportion each column appropriately within the report display region so as to utilize the entire display region. When Fit Columns is disabled, columns will be reduced to the smallest possible size and may not span the width of the display region.
|
|||
The Display Precision value (2 through 6) will determine the number of decimal places that will be considered when data is displayed in DataUtility. The default number of decimal places is 2 (0.00). |
|||
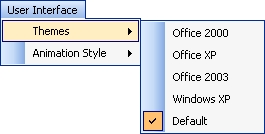
The User Interface menu can be used to customize the appearance and style of the DataUtility Interface. The Themes menu lists styles based on several versions of Windows OS versions. The Animation Style menu refers to the way DataUtility handles the various regions of the window. Explorer leaves each section open while the Toolbox mode will collapse a region when a new one is opened.
The Tools menu can be used to run script-like functions on the database. Therefore, these operations should only be performed by a Database Administrator.
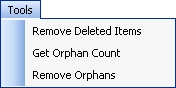
When you delete an object in DataUtility, it is not immediately removed from the Database. Instead, the object and any dependants are flagged as "deleted" within the Database, and a subsequent task must be performed in order to complete the operation. The Remove Deleted Items option in the Tools menu will remove any items marked for deletion from the database. This should be done on a regular basis as part of your scheduled Database administration.
The Remove Deleted Items operation is also available as one of a pair of stored procedures (the other being Remove Orphans) that could be part of a job in Oracle or a script. On an active production database it is recommended that the procedure is run more often, or if there is an excess of deletions, that Remove Deleted Items is run manually from DataUtility.
The Remove Deleted Items script could be run after a Database backup.
The Get Orphan Count function will return the number of orphans that exist on the top level of the database.
If you have All DataSources selected in the menu bar dropdown, then all DataSources in the Site database will be counted. If you want to get the orphan count on a single database within a Site, select the Database label from the dropdown menu.
As a result of Database manipulation or malfunctions within the CM4D software, data can be orphaned, or left without a parent Routine to be connected to. When that happens, the features are useless and need to be removed from the Database in order to keep the database functioning at peak performance. The Remove Orphans option provides a method for you to clean up orphan and thus eliminating some data performance-degrading problems within the CM4D Databases.
Backup your Database before using the Remove Orphans function. This function may be a long, intensive operation depending on the number of orphans that exist in the database.
The Remove Orphans operation will remove the following from the database:
· Features without a Routine
· Samples without a Feature or Routine
· Actuals without a Sample
· Characteristics without an Actual
· Characteristics without a Feature
· Orphaned Site Routines
The Remove Orphans operation is also available as one of a pair of stored procedures (the other being Remove Deleted Items) that could be part of a job in Oracle or a script. On an active production database it is recommended that the procedure is run more often, or if there is an excess of deletions, that Remove Orphans is run manually from DataUtility.
The Remove Orphans script could be run after a Database backup.