The CM4D Server Installation includes the core CM4D products, automation, scheduled reporting, alarm notification, web reporting, and database user privileges. This type of installation is installed on a network Server and licensed with a Named Network License. CM4D Server is available as either a 32-bit or 64-bit program.
CM4D Server Installations require a Named (Node Locked) Server License.
This tutorial will walk you through a new CM4D Server installation on Windows Server 2003 Server. If you have an existing CM4D installation, please refer to the topic Upgrading an Installation. The following instructions are only a simple example and your local system Administrator should always be consulted.
1. Configure the Server.
2. Install and configure eDocPrinter PDF Pro.
3. Install Database client (if does not already exist).
4. Run the CM4D Server installer.
5. Configure CM4D Services.
6. Install and configure EventSmith SMTP.
7. Create CM4D Database(s).
8. License CM4D.
9. Configure a CM4D Site Connection.
10. Start the CM4D Services.
11. Install CM4D on any CM4D Client machines.
12. Install CM4D Web.
Once you have successfully connected to the Site database, copy the CM4D.4ds file from your server to each Client system.
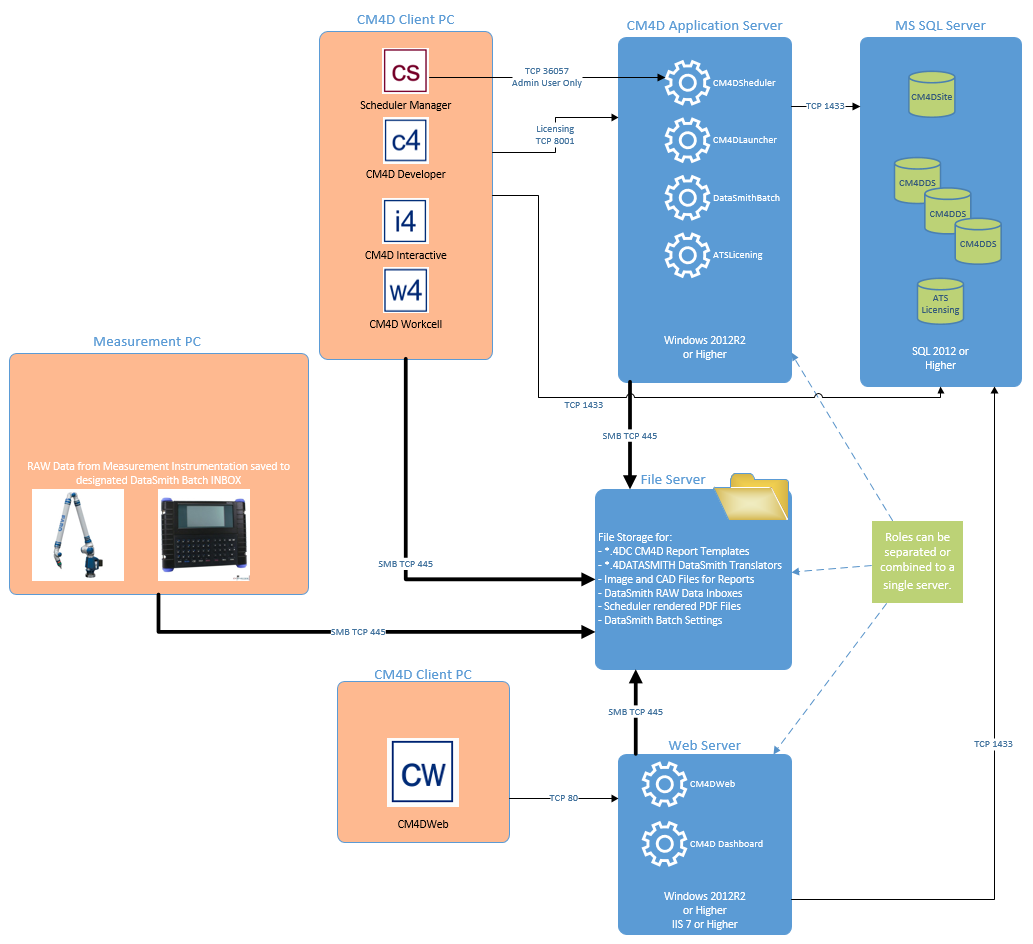
The chart below shows the process flow of a typical installation of CM4D on a network server. Your setup may differ. For more information on the ATS Licensing Server, please refer to the ATS Licensing help file.
The flow chart below demonstrates an example of how an enterprise installation might be setup, including the interactions between clients and servers: