This guide contains the basic steps for upgrading a CM4D Server from v23 up to v24 and generating Results for your existing databases. This is a major version upgrade and should be done as a complete uninstall and then reinstall.
These steps may also be followed if you are upgrading a standalone Client system, in which case just ignore the references to the CM4D Scheduler, DataSmith Batch and EventSmith.
Prepare for the Upgrade
Contact your ATS sales representative or ATS support for assistance.
Obtain v24 CM4D Licenses.
Obtain the v24 CM4D Server installer.
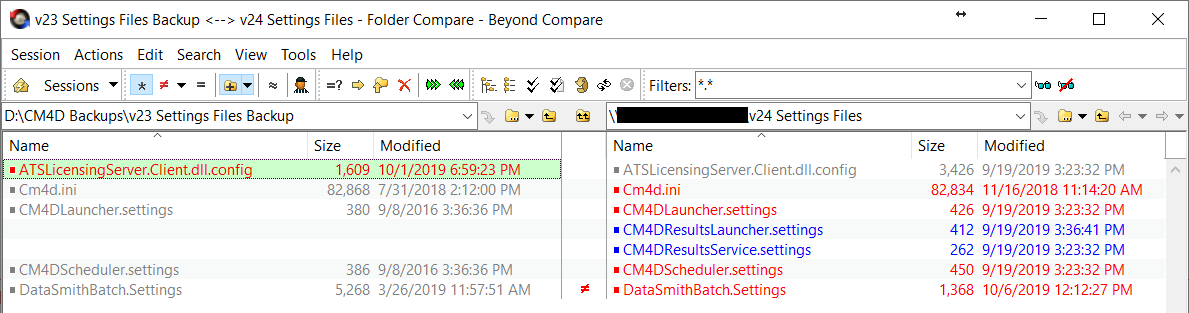
Perform a backup of all of your CM4D install/configuration files and databases.
CM4D.4ds - file can be copied to v24
Cm4d.ini - for content comparison only
CM4DLauncher.settings - for content comparison only
CM4DScheduler.settings - for content comparison only
DataSmithBatch.Settings - file can be copied to v24
ATSLicensingServer.Client.dll.config - for content comparison only
Site DB - for backup only
CM4D DB(s) - for backup only
Do not directly restore configuration/settings files from v23 as there may be changes or updates that you need in the new files installed with CM4D v24. It would be best to compare these files directly to the files created by the installer and only take the information you need. Keep the previous files only as a backup and a reference for connection/configuration information. The only exceptions are the CM4D.4ds and DataSmithBatch.Settings files.
Uninstall CM4D Server v23
Uninstall CM4D v23.x. If you are running an older version, refer to the migration guides to get up to v23.
Uninstall CM4D Printer (if installed with v23.6).
Delete the CM4D installation folder and all remaining files/folders.
Uninstall eDoc PDF Printer (optional). Complete this step only if you have eDoc PDF Printer and want to switch over to the ATS CM4D Printer (embedded with v24 installer).
Reboot your computer.
Install CM4D Server v24
Before starting the CM4D installer, the 'Print Spooler' Windows service must be running. If the service is not running, the installation will fail.
Run the CM4D Server installer.
Run the CM4D Server installer executable (Run as Admin).
Install the Prerequisites (restart the machine if prompted; on restart, installer will resume automatically).
Set the Installation folder.
Select the Installation Type 'Configure and Install'.
Enter Services user information. This user does not have to exist at this time but when you do create it be sure to use the same information.
Enter the name of the ATS Licensing Server.
Upgrade Databases
Upgrade v23 Databases. Update the latest v23 databases (23a-23d) to v24 (24c-24b).
Check your current schema versions (Programmability>Stored Procedures) for the Site (dbo.SiteSchemaVersion) and CM4D (dbo.SchemaVersion) databases . If you are not currently at the latest Site Schema 23d and CM4D Schema 23a, you must run any interim v23 update scripts before running the v24 update scripts.
Update your Site Database:
From the database dropdown, select your v23 CM4D Site database.
Go to the install folder (.\CM4D\Database Scripts\SQL Server) and open "UpdateSite24a.sql".
Click Execute.
Execute the "UpdateSite24b.sql" script.
Next, execute the "Site Indexes.sql" and "Site Grant.sql" scripts.
Update your CM4D Database(s):
From the database dropdown, select a v23 CM4D database.
Go to the install folder (.\CM4D\Database Scripts\SQL Server) and open "Update24a.sql".
Click Execute.
Execute the "Update24b.sql" script.
Execute the "Update24c.sql" script.
Next, execute the "Indexes.sql" and "Grant.sql" scripts.
If you have more than one CM4D database, execute all of scripts on each of those databases in the same order listed above.
Configure v24 CM4D
Connect to Site Database
Connect to the CM4D Site Database. If you have an existing v23 CM4D.4DS file, you can copy it from your backup folder (archived in step 1) to the v24 install folder. If you do not have a 4DS file, run DbConnect (as Administrator).
Run DbConnect (as Administrator).
Connection Type - Change the dropdown to "Site Connection".
Windows Authentication - Select one of the two available methods of authentication for connecting to the databases:
Windows Authentication - Set the dropdown to 'True'.
SQL Authentication - Set the dropdown to 'False'.
Database User ID - Enter the user name of the SQL user login.
Database Password - Enter the password for the SQL user.
Confirm Password - Re-enter the SQL user password.
Server Name - Enter the name of the database server. If using a Named Instance, include this in the server name.
Database Name - Enter the name of the CM4D Site database.
Click Apply.
Click Test Connection.
If successful, click OK and continue to the next step.
If the connection fails, check all of your settings and then test again.
Click OK to exit DbConnect.
Restore Configuration Settings
Restore CM4D configuration settings. Compare the files archived in step 1 of this upgrade to configure the new v24 files as needed. DO NOT REPLACE the new v24 files with the old files saved from v23!
DataSmithBatch.Settings. Confirm or set the default settings file location.
Run DataSmithBatch Manager as Administrator.
In the top left of the interface, find the Batch Processor Settings section. If this is incorrect, complete the following:
Click the ellipses following the File Path.
Browse to the existing DataSmith Batch settings file.
Select the folder and click OK.
Click Make Default.
Click Save & Exit.
Configure ATS CM4D Printer
Configure CM4D Printer. If you have eDoc installed, you may choose to skip this step.
Browse to the CM4D install folder (.\Applied Tech Systems\CM4D).
Edit the Cm4d.ini file (requires READ/WRITE Administrator privileges).
In the [default] section find the parameter "PDFPRINTDRIVER".
Set the value to "ATS CM4D Printer".
Comment out (#) the other print driver options or delete the unused lines entirely.
Save and close the Cm4d.ini file.
Configure Results Database Connection
Configure Results Database Connection. This is a REQUIRED step. Until you complete this step you will not be able to run any other CM4D applications (besides DbConnect and Site Manager).
Run Site Manager.
Go to the Results DataSource tab and enter the required information.
The Results database object may not exist at the time of initial configuration if this is a brand new installation (Test Connection will FAIL - this is ok). The information still needs to be entered here since it will be used by DbMigrator to create the database object when the tool is run.
Server Name - Enter the name of the database server. If using a named instance include the instance name with the server.
Database Name - Enter the name of the Results Database.
Windows Authentication - Select one of the two available methods of authentication for connecting to the databases:
Windows Authentication - Set the dropdown to 'True'.
SQL Authentication - Set the dropdown to 'False'.
DataBase UserName - Enter the user name of the SQL user login; must have the 'dbowner' privilege level in SSMS. This is the login used by DbMigrator to create/modify the Results database in SQL Server.
Password - Enter the password for the SQL user.
Confirm Password - Re-enter the SQL user password.
Click Test Connection.
If successful, click OK and continue to the next step.
If the connection fails on an existing Results database, check your settings and then test again.
If the connection fails in a new installation (before Results db is created), this is ok and you can continue to the next step.
Click Save.
Create the Results Database
Run DbMigrator
Create Results Database.
Browse to the CM4D install folder and go to the DbMigrator folder.
Edit the ATS.CM4D.Conestoga.DbMigrator.exe.config file.
Set the following information:
fiscalStartMonth - Set the month of the start of your fiscal year. Enter a value of 1-12. The default setting is "1" (January).
fiscalStartDay - Set the day of the month as the start of your fiscal year. Enter a value of 1-31. The default setting is "1" (first day of the month). Must be a valid day for the set month.
Run ATS.CM4D.Conestoga.DbMigrator.exe.
When prompted, hit Y to continue.
Wait for the process to complete.
When it is finished running, the Command Prompt will read ''Successful migration. Press any key to exit application".
Test Results Db Connection
Test Results DataSource Connection.
Go back to Site Manager.
Go to the Results Datasource tab.
Click Test Connection.
Click OK to acknowledge the success message.
Click Save. Leave Site Manager running.
Post-Installation System Configuration
Start Services
Start Results Services. If you did not configure service logon user during the CM4D installation, edit the properties of each service and set the Logon User.
Open Control Panel > Administrative Tools > Services.
Start the following services (in this order):
Results Service
Results Launcher
Results Loader
On new installations, the services may not start. If you are using a service user account that has never been granted the Log On As A Service rights, complete the following steps on one service.
Right-click on the Results Service and select Properties.
Go to the Log On tab.
In the Log on as section, select This account.
Enter the User credentials for the user account that will run the CM4D service.
Click OK.
Click OK on informative message ‘The account … has been granted the Log On As A Service right.’
Start the 2 remaining Results services.
Synchronize CM4D with Results
Synchronize CM4D Databases with the Results Database. This is a REQUIRED step. Until the synchronization export is complete, you will not be able to access the database.
Go back to Site Manager.
Go to the Managed DataSources tab.
Select a database.
Click Export to Results Database.
Click OK to acknowledge the caution message: "This will export the entire database! This may be a very long operation, and will render the datasource unusable until export is complete. Continue?".
Look at the Export Job Count field, located under the Export to Results Database button. As long as the Results services are running, this Count will begin to decrease as the export jobs are processed. Until this count is zero the synchronization is not complete.
Once the Export Job Count is zero, export all remaining CM4D Databases to the Results database.
You can close Site Manager it and reopen it while the export is still running; the synchronization will not be effected.
Create and Assign Results Rules
Create Results Rules in CM4D
Create Results Rules.
Run CM4D Classic.
Create a new document and connect to your Site database. You may load a Routine into the query if you want to be able to see your data, but this is not required to be saved in the document.
Create a new DataSet.
Open the DataSet Properties.
Enter a DataSet Label. This label is the name of the Results Rule; must not include any special characters (*, ?, &, #) that are reserved by SQL Server.
It is recommended to make the label somewhat descriptive of the type of results the rule is configured to generate. For example, "Normal", "XYZ" or "Toleranced". This will make it easier to recognize which rule(s) to assign to Samples in DataUtility.
Click Sift Rules.
Select the Feature Types and Characteristics that you want to use for this rule. Only feature and characteristic types selected here will be used to generate results for your data.
Click OK.
Go to the Data Source tab.
Leave the Query set to Active.
Select All Features.
Select All Samples.
Click OK.
Optionally, Create a new DataSet for each Results Rule definition. A sample can have multiple Results Rules assigned at once. Assigning rules is the next step in the upgrade.
Save the document as "CM4D Result Rules Interface.4dc".
Assign Rules in DataUtility
Assign Results Rules to Samples.
Search for Routines.
Right-click a Routine and select Keep Selected Row(s). This will narrow your search to a single Routine.
Go to the Sample Search tab and click Search.
Add the Column "Results Rules" to the grid.
Next, select a series of Samples.
Right-click in the Results Rules field and select Edit Results Rules.
From the Results Rules dialog, enable the check box for at least one of the available rules (there may only be one).
Click OK and Commit Changes.
Repeat this step for all Samples for all Routines have at least one Results Rule assigned.
Final Steps
Start Other CM4D Services. If you did not configure service logon user during the CM4D installation, edit the properties of each service and set the Logon User.
Open Control Panel > Administrative Tools > Services.
Start the following services (in this order):
Results Service (if not already running)
Results Launcher (if not already running)
Results Loader (if not already running)
Scheduler Service
Scheduler Launcher
DataSmith Batch
For Server installations that also use EventSmith, start the following:
DataConnect
EventSmith SMTP
This completes your v23 to v24 Server upgrade.
Optional next steps may include:
Export any remaining CM4D databases that have not yet been synchronized with the Results database.
Create additional Results Rules in the CM4D Results Rules Interface document by adding new DataSets for each additional Results Rule; save the document.
Assign additional Results Rules to Samples.