Defect Triggers send notifications when individual defects are entered into the Inspect system. Administrators can customize these triggers so that notifications will be sent when a specific type of defect occurs on a specific component used in one product. Defect triggers can also be set up to send notifications when any defect occurs on any component used in any product assembled in the plant.
Use the sleep interval to turn this trigger off for a set amount of time for the exact defect match.
To create a Defect Trigger carry out the following steps:
1. From the Event Types list select Defect Triggers.
A list of the existing triggers will be displayed.
2. Click New...
The General form will be displayed.
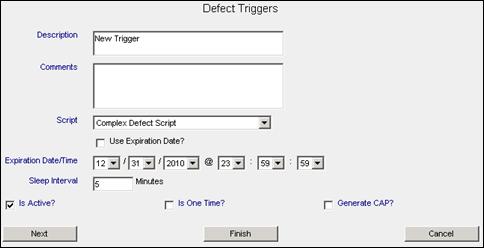
3. Complete all the items in the form according to the following table.
| Description | A description of this new trigger. This description will appear in the Event Description column of the Defect Triggers table. |
| Comments | Comments about the Defect Trigger. |
| Script | Select the script that you wish to use for the trigger. For more on scripts see Creating Scripts. |
| Use Expiration Date? | When this box is checked, the expiration date and time will become active and once the specified expiration date/time has passed, the trigger will be marked inactive. |
| Expiration Date/Time | The date/time when the defect trigger will expire and become inactive. |
| Sleep Interval | After a trigger is active, the number of minutes that go by before the trigger is reactivated and another notification is sent. Use it to turn the trigger off for a set amount of time after the exact defect match. |
| Is Active? | If this box is checked, the trigger is active. If it is unchecked, the trigger is inactive. |
| Is One Time? | If this box is checked, the trigger will become inactive after it fires one time. If this box is not checked, the trigger will continue to fire continually, or until it is marked inactive. |
| Generate CAP | If this box is checked, the trigger will activate a CAP event. |
4. After finishing the General form, continue to complete the Conditions forms (see here).
Click the Next button at the bottom left of the General form.
Or
Click Products in the navigation bar.