CAD views are usually 3D views that allow you to precisely highlight where the defect has been found on a 3D model of the product.
Selecting a View
Select the View on which you want to record a concern.
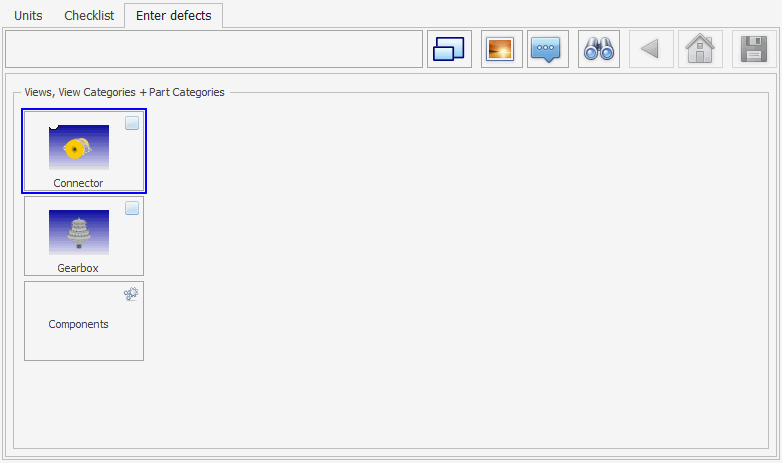
The selected view will be shown as follows:
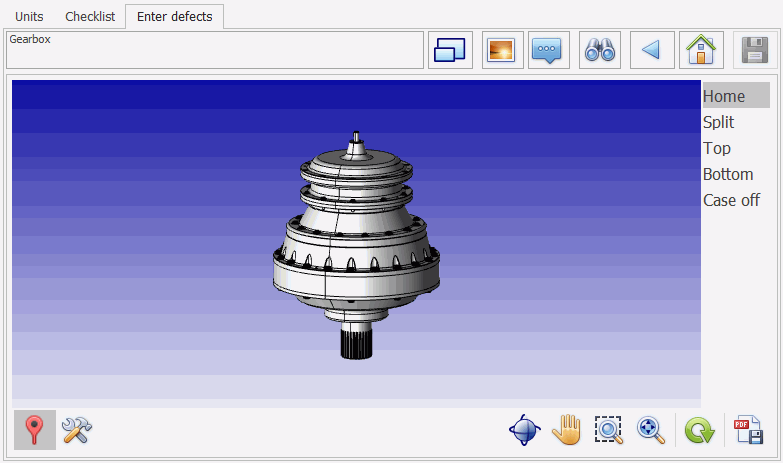
Using Bookmarks
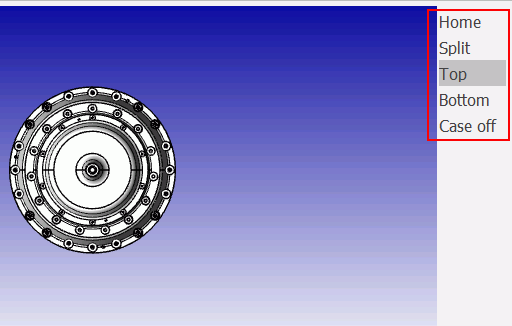
Bookmarks can be used in Data Collect to jump to pre-defined perspectives. It can also show or hide a selection of components or display a cut-through of the product. This can be useful if the operator needs to place a defect on a component that's hidden beneath other components.
If bookmarks have been set up for the view they will be shown beside the view.
Select a bookmark to jump to it.
Moving Around the View
Move around the view using the options below.
|
Action |
Button and description |
|
Panning |
|
|
Zoom to area |
|
|
Fit image to window |
|
|
Orbit |
Rotate view by clicking and dragging. This can also be done when entering and repairing defects. |
|
Reset view |
|
Entering Defects
You can refresh the defects displayed for a unit either by selecting it again in the unit list or by clicking the Go button (![]() ). This can be useful if defects are being entered at multiple stations.
). This can be useful if defects are being entered at multiple stations.
Click the Enter Defects ( ) button.
You can only mark a defect on active components. The cursor changes to an arrow at right-angles to the surface when you are over an active component.
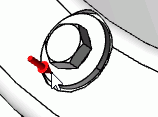
Click on the Component at the defect location.
The concern selection window opens.
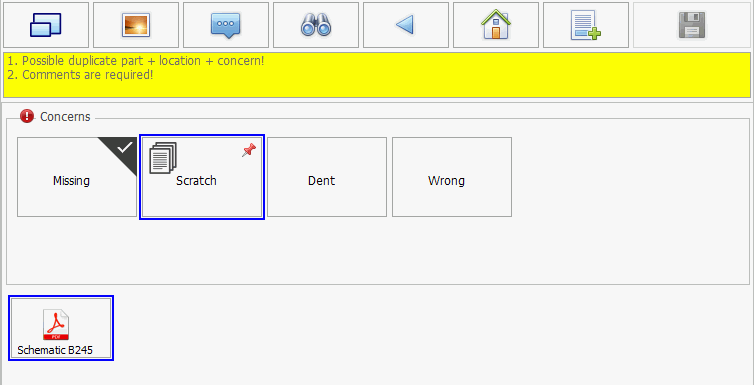
If there are documents associated to a concern then the document icon (![]() ) will be shown in the corner of it. Click on the icon to show a list of the associated documents and then click on the document to open it.
) will be shown in the corner of it. Click on the icon to show a list of the associated documents and then click on the document to open it.
Select a Concern.
A warning is displayed if the part/location/concern matches an existing defect on the unit.
The rank selection window opens.
Select a Rank.
The responsible area and responsible cell selection window opens.
Select a Responsible Area and Responsible Cell.
Enter any required comments relating to the defect.
Enter a Track Number. This is a unique identifier for the defect.
Enter a Quantity. This is used when there are multiple defects of the same type on a part. By default the value is 1.
Enter a Recurring Qty. This is used when the same defect is found on consecutive, identical parts. The default value is 0 with a maximum of 1000.
For further information on Recurring Defects, click here.
If the Reference Documents control is present (see here) you can view images and guidelines, associated to the selected concern, by clicking on their images. These will help you to correctly fill in the form.
Click OK to apply the concern and return to the View screen.
The defect is highlighted on the view with a flag that contains the name of the concern with the repair status represented by the color on the left and the rank represented by the color on the right..

For more information on defect flags see here.
Highlight Which Views Have Been Checked
If you're carrying out an inspection in a view by view basis you can specify which views have been inspected and which haven't.
Click Check Items underneath the list of available views, view categories and part categories.
Click on the views that have been inspected.
A check mark will appear in the corner.

Click Check Items again to stop highlighting views.
 Select and then click and drag the image to move around it.
 Select and then click and drag over the area you want to zoom to.
 Select to fit the image to the inspection window.
 Reset view to currently selected bookmark.