 Image Search Parameters
Images in CM4D are CAD product models dynamically associated with measurement data within a Routine or a Subroutine. The image files are physically located on the network and may be linked to a Routine and/or managed via DataUtility.
Image Search ParametersA search for every Image can be performed, or the search can be narrowed down using the Image Search fields in the Navigation pane located on the left side of the user interface (pictured below). Set your search parameters and then click the Search button. Only one search may be performed at a time.
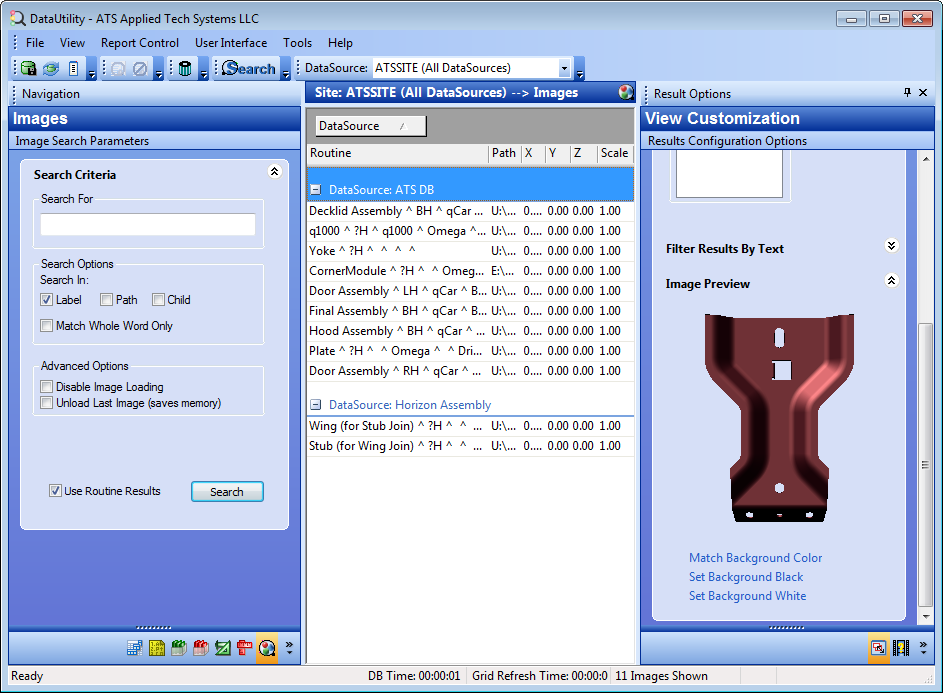
Enter any text you wish to search for in image strings. Use the Search Options to specify the location of the string you are searching for.
The three Search In categories, Label, Path, and Child, refer to which part of the image string DataUtility will search for the text entered in the Search For field.
For example, if only the Label check box is selected, any text entered in the Search For field will only be matched to image labels. If the text only matches a Path, however, those results will not appear in the report because the check box for Path was not selected for that particular search.
Select the Match Whole Word Only check box to discount partial text matches from the search results.
For example, typing 'Decklid OTR' in the text edit field and selecting the Match Whole Word check box would only return images with the label 'Decklid OTR'. An image with a label such as 'Decklid Assembly' would not be included because only the first part of the label was a match.
There are two Advanced Options available when conducting an image search:
· Disable Image Loading - When the disable image loading check box is enabled, the Image Preview area will not be available in the View pane.
· Unload Last Image - Each time an image is selected in the display region, DataUtility will load the image in the Image Preview pane. If the Unload Last Image check box is enabled, each successive image selected in the results region will be unloaded from the cache. Keep in mind that if images are unloaded from the cache, switching back and forth between images will take more load time than if they remained loaded.
When the Use Routine Results check box is selected, the Image Search will only be done within the routines that were returned for your current Routine Search. If no Routine Search was performed prior to your Image Search, DataUtility will conduct an internal default routine search and use all of the routines found in your selected DataSource. The Use Routine Results option is selected by default.
1. To view the images associated to your Routines, click the Image Search tab.
2. Set your search parameters, and click the Search button as described in the topic Searching for Data.
3. All images within your Database will appear in the Display Region.
4. Clicking on an Image label will show the image in the Image Preview window within the Data Viewing pane, unless the Disable Image Loading has been selected in the Advanced Options section of the Image Search Parameters pane.
5. Within the results of an Image search, you may also add images to any Routine by right clicking any blank area of the Display Region and selecting New.
6. The Create a New Image dialog will now have the Routine list enabled. Select the Routine that you would like to add the new image to and continue entering the necessary fields as described above. The Routine list will contain every Routine in the Database, regardless of your search or display parameters.
7. To add an Image to a specific Routine as described from the Routine search results, right-click on an image already assigned to that Routine and follow through with the same steps. Although, this method will also allow you to select any Routine from the Routine list within the Create a New Image dialog.
8. Once you have added images as desired, save your changes to the Database by clicking the Commit ( ) button in the toolbar.
Path Elements refer to the various sections of a path name of an Image. To change one (or more) path element, select the check box and enter the information that you want to use for the selected image(s).
The only element in the Image Results region which may be modified using the multiple select function is the Path.
Once you click OK, you will still have the option to Revert your changes before committing the changes to the Database.
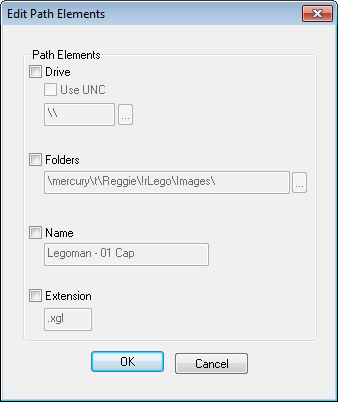
Select the Drive check box and enter the letter (or name, if applicable) of the drive where the image is stored. You may either enter the text manually in the field, or browse to the drive using the browse ( ) button.
If you are using UNC paths, select the Use UNC check box and then enter the full path (including the computer name and drive) in the Folders field below.
Select the Folders check box and enter the folder path (if using UNC paths, include computer name and drive) where the image is stored.
Select the Name check box and enter the image name that you want to use. The name label will be applied to the selected image(s).
Select the Extension check box and enter the extension that you want to apply to the selected image(s).
See the topic Data Viewing Options for more information on previewing Images.