Sticky Reports
Topic Contents: ShowHide
CM4D Interactive has a session-based memory. Adjustments to what is
displayed in the reports (such as selecting different Sift Rules, altering
Query settings, View orientation, etc.) are discarded when CM4Di is closed.
To preserve those changes for use during a future session of CM4Di, you
can save a Sticky Report.
A Sticky Report is a user-customized
report based on the standard-issue CM4Di reports provided by your company.
You can make small adjustments to the arrangement of annotation and save
the new report to the database. Sticky Reports will save the following
information:
· Annotation
Type
· Query
Information
· Sift
Rule Settings
· Subroutine
and/or Alignment state
· Active
Sample
· View Cameras
and Orientation
· Report Layout
While similar to saving
a Template in CM4D Classic, Sticky Reports are intended to be used
as a "place-holder" rather than a precise copy of the original
report. Any changes to the startup template or Routine data will alter
the appearance of your Sticky Report when re-loaded. If information is
missing or changed, CM4D Interactive attempts to load the report as close
to the original as possible, but you may need to manually make some adjustments
to the Sticky Report. Use the ReportTweak
tools to add or remove annotation as needed.
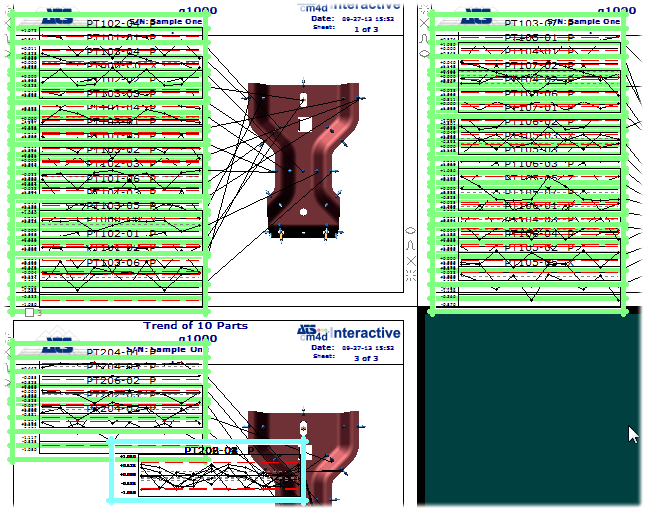
- A Sticky Report is saved that uses a report type
called "Single" (made up of Text annotation) as the base.
The Report called "Single" is deleted from the startup template,
and a different report type labeled "Trend" (made up of
Trend charts) becomes the default Report when Interactive is loaded.
Next time the Sticky Report is loaded, the "Single" report
cannot be found, so CM4Di may use "Trend" to load the data
for that Sticky Report.
Prerequisites
For a report to be saved as a Sticky Report, it must meet the following
conditions:
· Each Sheet must have only
1 View.
· The Report must only use
1 Annotation type.
· The Report must be a "Multi-Sheet"
Report.
Identify
a Sticky Report
Sticky Reports are identified in the Database by the Label
and Scope. A Sticky
Report is linked to the Routine that was used to create it, so it can
only be accessed via the Query
Control of the parent Routine.
 Example
If you load 'Routine A' and create
a Sticky Report called "Trend" that has a scope set to User,
you end up with a report labeled in the Query Control as "Trend ^ User". If you then
load 'Routine B' and create a new Sticky Report called "Trend"
with the scope also set to User, clicking Save
results in this message:
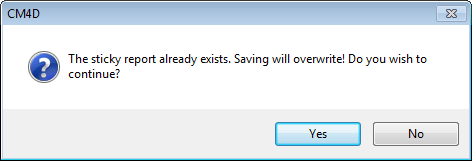
Click Yes to continue to overwrite
the 'Routine A' report, or click No
to cancel (new Sticky Report for 'Routine B' will not be saved).
Sticky Report Labels
Sticky Report labels are suggested when you initiate the Sticky Report
mode. However, you can assign any label string, as long it is unique within
each scope.
Sticky Report
Scope
The Scope of a Sticky Report determines who can access or modify a saved
Sticky Report.
· Public
- Available to all users in the database. Any user can load, modify, or
delete the Sticky Report. This is the default Scope setting.
· User
- Available to the current user only. Only the user that created the Sticky
Report will be able to load, modify or delete it.
· Group
- Will appear in the list as the Group Label (e.g., "Admin").
Available to all users that belong to the selected group. Any user that
is a group member can load, modify, or delete Sticky Reports.
Create a
Sticky Report
1. Load
the report you want to use as a starting point (base report) by selecting
a Report label from the Report Type dropdown
menu.
2. Enable Report Tweak mode
by clicking Toggle ( ).
).

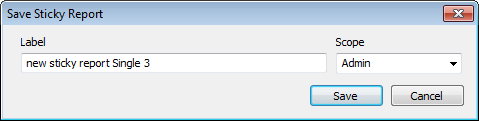
3. Enter a unique Label
for the Sticky Report.
4. Select a Scope.
This determines which users will have access to the Sticky Report. If
you are saving to a Group, select the Group label from the dropdown.
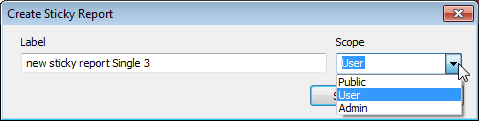
5. Click Create.
6. Modify
your report.
7. Select File
> Save.
8. Click OK.
Load a
Sticky Report
1. Right-click
the Routine you want to load, and click Properties
to open the Query Control.
2. Go to the Sticky
Reports tab.
3. Select a Sticky Report
label from the dropdown menu.
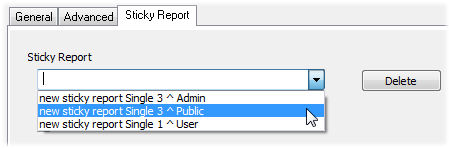
4. Click Load.
Delete
a Sticky Report
To delete a Sticky Report:
1. Right-click
the Routine that the Sticky Report is associated with, and click Properties to open the Query
Control
2. Go to the Sticky
Reports tab.
3. Select the Sticky Report
label from the dropdown.
4. Click Delete.
5. Either Load
the Routine, or click Cancel to
close Query Control.
Modify a Sticky
Report
Sticky Reports can be altered by changing the type of annot used in
the report, adding or removing annotation, changing the layout of a report,
or modifying the orientation of the Views. Use the ReportTweak
tools and context menus to add, remove, or rearrange your annotation.
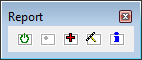
Sticky
Report Tools
Report Tweak mode
is a reporting tool that is used to create and manage your Sticky Reports
in CM4Di. When ReportTweak is enabled, annotation are clearly marked
with color indicators that will show you what is wrong with your report.
Color |
What it Means |
Solution(s) |
Green |
Valid annotation. |
No action required. |
Red |
Invalid, missing, or incorrect annotation. This may be due
to changes to what data exists in the database, feature/sample
labels, filters, etc. |
You can use one of two options:
Add
- if alternate/acceptable data can be found in the DataSet, the
red annot will be converted to use the new/correct data.
Clean
- all red annot will be removed from the report. |
Blue |
New valid annotation added to the report
using the Add option. |
Click Add
a second time to confirm the new annotation and the blue annot
will turn green. |
Fushcia |
Annotation has at least one duplicate
within the report. |
Click Clean
to remove all duplicates of the annotation, leaving one valid
annotation. |
Yellow |
Unresolved annotation. |
Click Add
to resolve the annotation.
Click Clean
to remove the unresolved annotation from the report. |
Teal |
Annotation is not currently part of the
report, but is similar to the annotation in the report and can
be may be used for adding additional data to the report. |
Click Add
to add the similar rows to the available annotation places in
the report.
Click Clean
to disconnect them from inclusion with the current report. This
method will not remove the annotation from the report, only association
to the other annot in the report. |
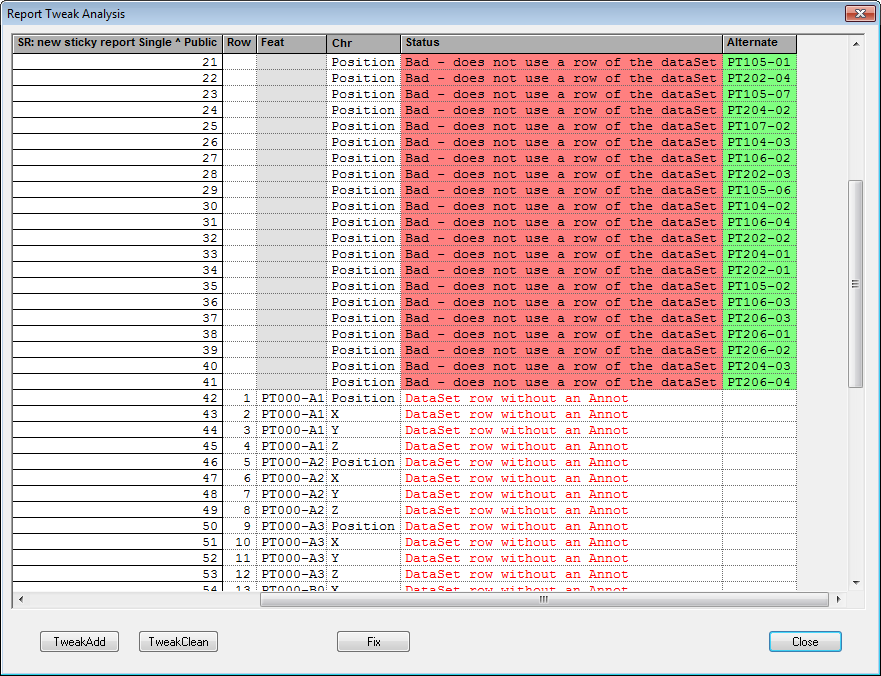
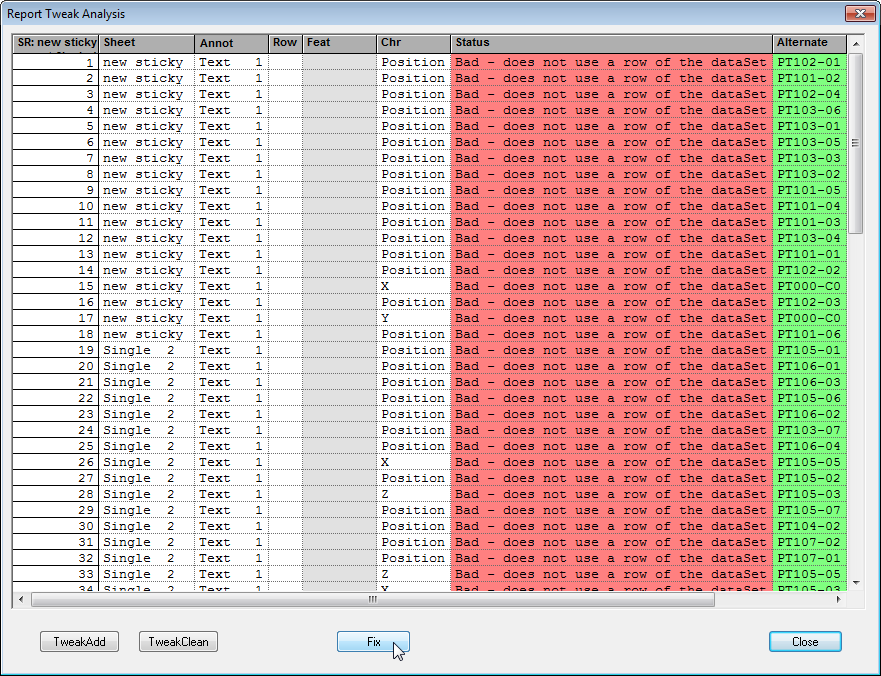
Report
Tweak Analysis
The Report Tweak Analysis dialog
analyzes how the loaded data matches up with the annotation in the report.
· TweakAdd
- Adds a new annotation to the last sheet of the report for each row in
the DataSet that does not already have an annotation in the report; performs
the same function as the Add ( )
toolbar button.
)
toolbar button.
 Tip
Tip
If new Features are added to a Routine,
any additional annotation (and sheets) are added to the end of the
report as needed when the Sticky Report is loaded.
· TweakClean
- Removes all invalid or duplicate annotation from the report; performs
the same function as the Clean ( )
toolbar button.
)
toolbar button.
· Fix
- When there are alternate features available, you can use Fix to automatically
change the invalid annotation to use the alternative features.
Change
Annotation Type
Change the annotation
to a new type by selecting a new Report Type
from the dropdown menu. You can only change the annotation type to an
annot type that already exists in your Startup template. If your startup
document does not contain a report type that uses Bar graphs, for example,
you cannot create a Sticky Report that replaces Trend charts with Bar
graphs.
For example, you can change the type of annotation that is used in a
report from a Text box to a Trend chart, and then move the charts to new
locations on the sheets.

Selecting a new Report type while working with a Sticky Report will
keep your report layout, but the annot are replaced with the annotation
type used in the selected Report. Annotation position will remain, but
the changed annotation will be the size they were in the original report.
If the new annotation type does not fit your current report layout, you
can create additional sheets and move the annotation to new positions.
Add Annotation
In some cases, you will need to add additional annotations to the report
and adjust the location of the annot on the sheet.
1. To
add annotation to the report for any remaining data not already in the
report, click the Add ()
button on the toolbar.
2. The annot are then added
to the last sheet of the report. The blue highlight indicates that the
blue annot are the most recent annot added to the report.
3. Save
your Sticky Report.
Move Annotation
You can adjust the position of each annot
on the sheet using a combination of dragging/dropping on the sheet, and
various Report Tweak context menus.
1. Select
half of the annotation on the sheet.
2. Drag the annot to the right
side of the view.
3. Select all of the annot
on the sheet, right-click within the selection and choose Balance
from the menu.
4. The annot will automatically
move into positions that all the annot evenly balanced within the selected
area.
5. Keep the current annot
selected. Right-click and choose Uncross
from the menu.
6. The annot are automatically
rearranged within the selection so that all of the leader lines pointing
to the View are uncrossed.
7. Click Add () a second time and any
blue "New" annot will turn green, as they are now a valid Sticky
Report.
8. Save
your Sticky Report.
Fix Missing
Annotation
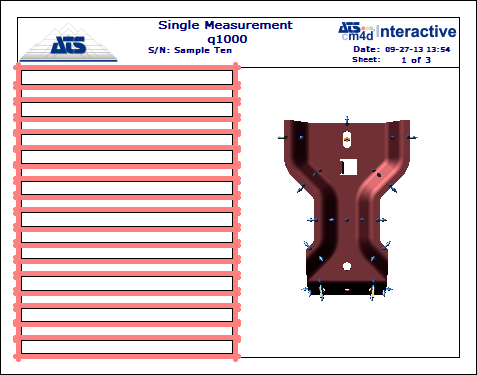
1. When
you load a Sticky Report, you may see one or more annotation highlighted
in red, indicating invalid annotation or missing data.
 Notice
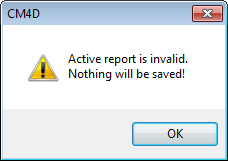
If the active report is invalid,
you cannot save the Sticky Report. If you attempt to Save
or rename
the Sticky Report, you will receive the following message and your
report will not be saved:
2. To find out more about
this invalid condition, open the Tweak
Analysis dialog.
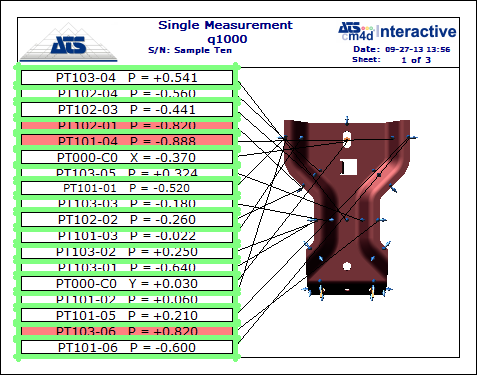
3. Here you will find more
information as to what is going on with your report. If cells in the Alternate
column are populated with Feature labels and highlighted green, this means
that CM4Di found features that are either a match or a close match to
what was supposed to be in the empty annotation.
4. Click Fix
to exchange the red annot for the green, and then click Close.
5. Your report will now appear
with green annotation, indicating that your report is valid.
6. Save
your Sticky Report.
Add or Move Sheets
While in the Array Sheet, you can add, delete, or move sheets within
the report. Special icons (or glyphs) appear in the Sheet margins while
Report Tweak mode is toggled on and you are in the Array Sheet.
 Active - marks the sheet as "active";
use with context menu "Send All Annot" options
Active - marks the sheet as "active";
use with context menu "Send All Annot" options
 New
- inserts a new sheet
New
- inserts a new sheet
 Delete
- deletes the sheet
Delete
- deletes the sheet
 Ghost
- annot appear as text only and views appear as outlines
Ghost
- annot appear as text only and views appear as outlines
 Hide - temporarily conceals the
sheet in the array
Hide - temporarily conceals the
sheet in the array
 Show - reveals hidden sheet adjacent
to icon
Show - reveals hidden sheet adjacent
to icon
 Reference
See the CM4D Classic topic ReportTweak
- Array Sheet for more details on the Array Sheet margin icons.
Tip
If you alter the arrangement of the
sheets within the Array Sheet, the background will turn red, indicating
you are in the Altered
Array Sheet mode.
Rename
or Change the Scope of a Sticky Report
If you want to rename the active Sticky Report, or change the Scope:
1. Select
File > Save As... from the
menu bar.
2. Enter the new Label.
3. Select a new Scope
from the dropdown.
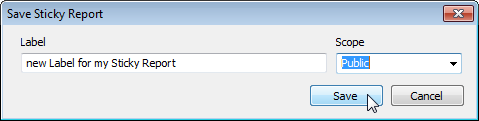
4. Click Save.
Troubleshooting
Sticky Reports
Leader Lines are attached to the wrong side of the annotation.
The CM4Di
Startup Document needs to have the correct leader attach locations
set. Check with your CM4D Template Developer to see if the Leader
properties are set up to allow leaders to attach
to any side of the annotation.
Standard CM4Di reporting uses AutoReport
to build the reports, and overrides the leader line attach locations in
the startup document. However, Sticky Reports use Report
Tweak to build the reports, and which does not override leader attachment
locations.