Step 3 - Execute the Migration
Once your system has been upgraded to v21, open SiteManager to execute the Migration.
Steps to Complete
I. Select the Migration Export Path
II. Stage 1: Initialize Migration
III. Stage 2: Activate Migration
IV. Stage 3: Post Migrate Cleanup
V. Exit the Migrate S21 dialog
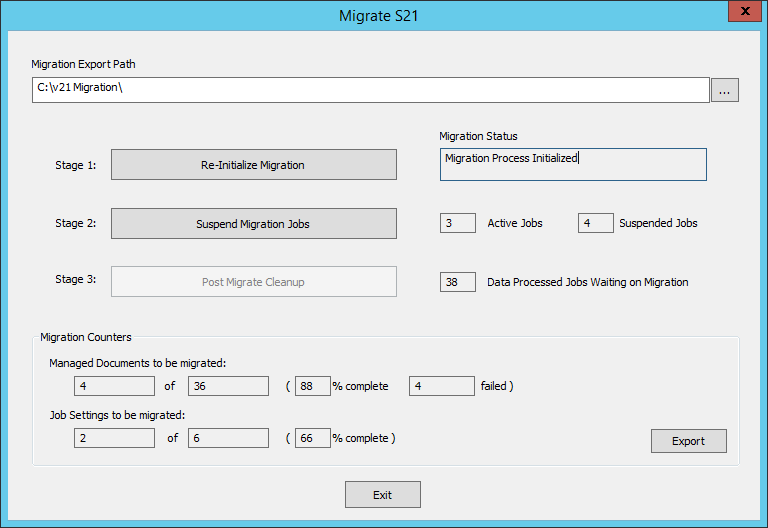
The Migrate S21 dialog is what executes and controls the actual v21 Migration. The first time that SiteManager is run after upgrading to v21, the Migrate S21 Tool opens automatically. This tool will open every time SiteManager is run, as long as you are still in Migration Mode. Once the final stage of the migration is complete, this dialog will no longer open. If at any time you exit the S21 dialog before you are done with the Migration, exit SiteManager and then re-run SiteManager. On re-open, the Migrate S21 dialog will be opened.
If the Migrate S21 dialog is still opening when you re-run SiteManager, it means that there is still some task remaining in the migration that must be completed.
If you have CM4D Scheduler Manager open at the same time that you are using the Migrate S21 dialog, you may not see things change or appear in the CM4D Scheduler Manager interface immediately. After using the Stage 1 or 2 buttons, click Revert on the Job Setup tab in CM4D Scheduler Manager to reload the job information from the Database, or Refresh the Job Queue tab to see the most recent information.
I. Migration Export Path
Browse to the Migration folder set during the v21PreMigration Analysis. This folder must contain the two map files you edited during the Analysis phase before upgrading to v21: v21MigrationMapReportPaths.txt and v21MigrationMapManDocs.txt.
II. Stage 1: Initialize/Re-Initialize Migration
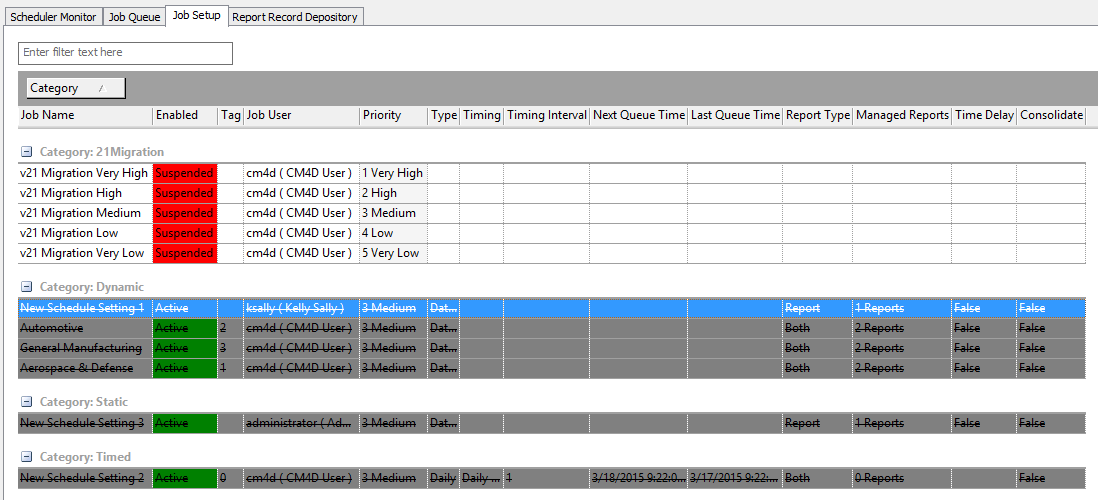
The first stage of the Migration imports the information from the two map files into CM4D Scheduler. The Migration Jobs are added to the Job Setup tab, the Migration jobs are sent to the Job Queue, and Report Depositories are put in the Report Record Depository tab. All existing Scheduler Jobs will be disabled in the Job Setup tab of CM4D Scheduler Manager. As the Managed Documents associated to the jobs are completely migrated, the jobs will come back online for processing. Show/HideShow/Hide
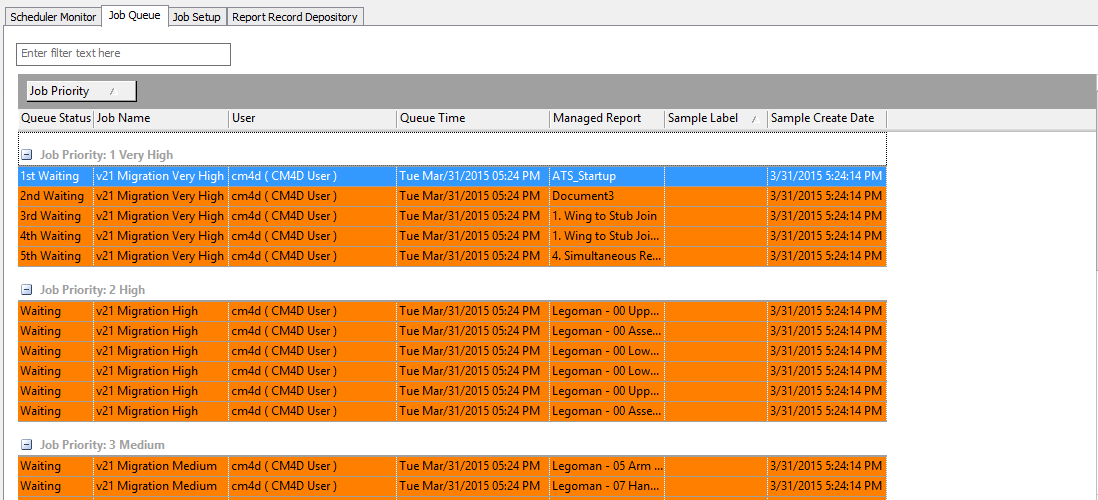
In the CM4D Scheduler Manager Job Queue tab, all Migration jobs will appear highlighted in Orange. If you do not see these right away, try clicking the Refresh button, or if you have Auto Refresh enabled, just wait for a few seconds.
- If you have not already started the Scheduler Services, these jobs will stay "Disabled" until you do so. Show/HideShow/Hide
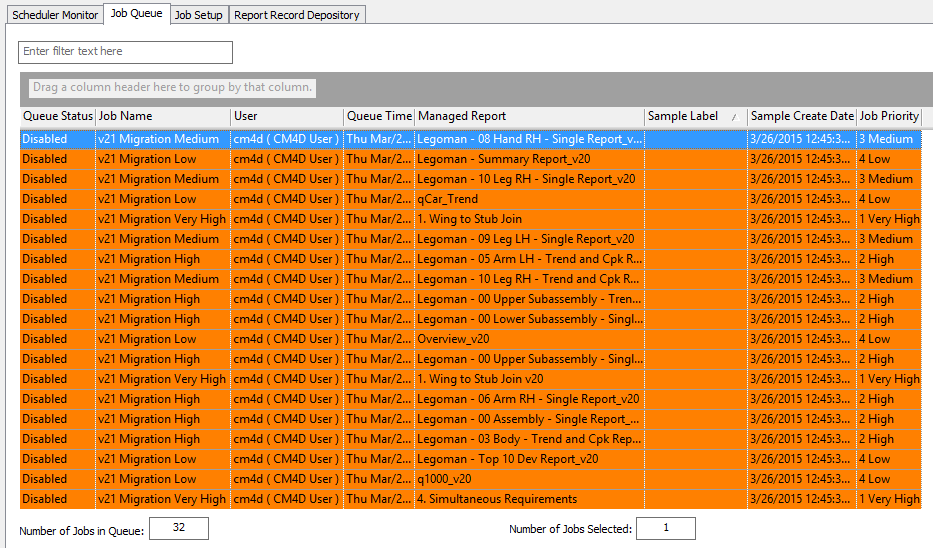
- If you started the Services before Initializing the Migration, the jobs will begin processing immediately. Show/HideShow/Hide
Initialize Migration
Once you click Initialize Migration, the two map files generated with the v21PreMigration Analysis tool will be imported and analyzed by the Migration tool.
Migration Jobs
The Migration jobs are added to CM4D Scheduler Manager Job Setup tab and will be assigned Managed Documents, Users and Priorities based on the information you provided in the v21MigrationMapManDocs.txt file. The number of Migrations Jobs created depends on how you set up your Managed Document map file.
For example, if you have three Job users set to migrate documents using all 5 priorities, then you will end up with a total of 15 Migration Jobs in Scheduler Manager.
If a Priority is not used for any of the documents, then a Migration job will not be created for that Priority.
If you have CM4D Scheduler Manager open before clicking Initialize, you may not see your Migration jobs in the Job Setup tab. Click Revert on the Job Setup tab in CM4D Scheduler Manager to reload the job information from the Database.
Existing PDFs with Report Records
If you were already using Report Record, then you will have Report Records in your database tables and PDF reports on your file system. If one of the following applies to your migration, take note of the way the migration will handle each case:
- Change Depository Path - if you choose to change the Depository Path in your map files as part of your migration strategy, any existing PDF reports will automatically be moved to the new path folder location. Keep in mind that you need to have WRITE privileges on the new folder (or on the folder that the new folder will be created in) for SiteManager to be able to move the files successfully.
- Invalid Report Records - if you have Report Records in your database table, but the actual PDF has been moved or deleted from the folder, the ReportRecord becomes invalid and will be removed from the database table automatically.
Re-Initialize Migration
Re-Initialize would be used if you make changes to your map files and want to use those changes for any Managed Documents that have not yet been migrated.
If a job is already processing when Re-Initialized, the job(s) will complete. Any queued "Waiting" jobs will be deleted.
On re-initializing, all Migration jobs will be removed and then re-added according to the information that is in the map files. The Migration Counter for Failed jobs will be reset to zero. Only Migration Jobs needed will be created, so if a Priority is not used for any of the remaining documents, then a Migration job will not be created for that Priority.
Jobs are recreated based on whatever information is in the map files, and the Migration Counter for Failed jobs will be reset to zero.
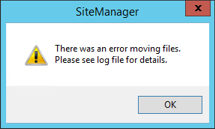
Failed to move files
You can also Re-Initialize if you have recovered/fixed any existing Scheduler Reports that failed to be moved to a new Depository location after the first Initialization. This can happen if files are open by another user, so make sure to close the file(s), then click Re-Initialize to attempt to move those files again. There may be other error condition possibilities.
III. Stage 2: Activate/Suspend Migration Jobs
This stage is where you can activate, or suspend, all of the Scheduler Migration jobs. You can change the status of individual Migration jobs in CM4D Scheduler Manager, but this button acts as a global toggle that will change the status of the Migration jobs to either all Active or all Suspended. The number of Active or Suspended jobs will be displayed in the two fields to the right of the Activate/Suspend Migration Jobs button.
You can start your Scheduler and Launcher services before or after Activating the migration. What the Activate button does is change all of the Migration Jobs from Suspended to Active, so the Migration jobs will not process until those Services are running.
Activate Migration Jobs
When Activate Migration Jobs is clicked, all of the Migration jobs will go from Suspended to Active. If you manually change at least one Migration job to Active in CM4D Scheduler Manager (and Save the change), this button will automatically change to Suspend Migration Jobs.
Suspend Migration Jobs
When Suspend Migration Jobs is clicked, all of the Migration jobs will go from Active to Suspended. If you manually change all Migration job to Suspended in CM4D Scheduler Manager (and Save the change), this button will automatically change to Activate Migration Jobs.
If you are seeing a lot of Failed jobs while the Migration is in process, you may want to Suspend the Migration and investigate the errors.
IV. Stage 3: Post Migrate Cleanup
This button will not become enabled unless the following conditions are met:
- Documents to be Migrated = 0
- Job Settings to be Migrated = 0
- Data Processed Jobs Waiting on Migration = 0
Clicking Post Migrate Cleanup will remove all Migration jobs from CM4D Scheduler Manager. It will also empty all of the temporary tables that had been created for the sole purpose of this migration. These tables can be completely removed from the database with the Cleanup Script that will be provided (for DBA's) with the v21 installation.
V. Exit Migrate S21
Once Stage 3 is complete, Exit the Migrate S21 dialog.
At this point, the Migration is complete, so once you exit the Migrate S21 dialog it will not re-appear when SiteManager is run.
Migration Status
The Migration Status field will display messages about the various stages of the Migration as it runs. Each message is displayed at a specific milestone.
|
Message |
What it means |
Triggered by |
|
Migration Mode Activated |
You have upgraded your CM4D system and database(s) to v21. You are now ready to run the Migration. |
Running the UpdateSite21a.sql script on your Site database. |
|
Migration Processing Initialized |
The two map files have been imported and analyzed by the Migration tool and the Migration jobs have been added to the CM4D Scheduler Manager. You can now Activate or Suspend Migration Jobs to carry out the migration. |
Clicking the Initialize button. |
|
Migration Processing Completed |
All Managed Documents have been successfully migrated. |
Old Managed Documents table is empty. |
|
Migration Mode Closed |
Post Migrate Cleanup has been run, indicating Migration is now done. |
After Post Migrate Cleanup is completed. |
Data Processed Jobs Waiting on Migration
While Migration Mode is active (and if the DataSmithBatch service is running), any new data that is added to the system for a Routine with the Data Processed flag set will be cached in a temporary queue. As Scheduler jobs have been migrated and come back online, the temporary job queue will be checked for any processed data that triggered a Scheduler Data Processed job. If so, that job will be sent to the Scheduler Job Queue for regular processing.
Until this number reaches zero, the Post Migrate Cleanup button will remain disabled. This counter is more of a status indicator than a counter, as the actual number here may be higher than the number of Data Processed jobs that will be Queued once your Scheduler Data Processed jobs have been migrated.
If the data does not need to trigger a job it will be discarded, and then the Post Migrate Cleanup button will become enabled. The jobs waiting on migration field will be checked on the same interval as the Retry Interval set for your DataSmithBatch, so if you have this interval set to a high number, you will see a longer delay between the completion of the Migration jobs and the Cleanup button enabling.
Data for Routines without the Data Processed flag that is processed by DataSmithBatch will not be affected by the Migration and will be put into the Database as usual. Only data that could potentially trigger a Scheduler Data Processed job must be cached so that a job can be queued as needed once the migration is done.
Migration Counters
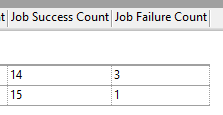
The Migration Counters displays counts taken directly from the Database as the migration proceeds so that you can see some feedback on the status of the Migration as it processes.

The number of Successful/Failed jobs can also be seen in the Scheduler Monitor tab of CM4D Scheduler Manager. Show/HideShow/Hide
Managed Documents to be migrated:
These fields provide feedback on how the Managed Document migration is progressing. The first field is how many documents are left to be migrated, and the second is the total number of Managed Documents that needed to be migrated. An overall percent complete is provided to help you gauge how long the entire process should take. A Failed field is provided to tell you how many Managed Documents have Failed the migration. Any failed documents will need to be analyzed to find out why they failed, so Export the feedback to help determine what documents failed.
Job Settings to be migrated:
These fields provide feedback on how the Report Path migration is progressing. The first field is how many Job settings are left to be migrated, and the second is the total number of Job Settings that needed to be migrated. An overall percent complete is provided to help you gauge how long the entire process should take.
Export Feedback
Saves current Migration Counter information about the Managed Documents as two XML files in the Migration Export folder:
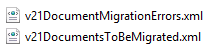
Messages will include information about the migrated files the same as you would see in the CM4D trace window or the log files. If you have failed documents, the Migration Errors file provides information about the document so that you can go back and solve the issue and Re-Initialize.
How to Perform the Migration
Following the upgrade to CM4D v21 and running the Database update scripts, run SiteManager.
In the Migrate S21 dialog, select the Migration Export Path (the folder set in the PreMigration Analysis tool).
Click Initialize Migration, once it is enabled.
Click Activate Migration, once it is enabled.
Once the migration is complete, click Post Migrate Cleanup.
Exit the Migrate S21 dialog.
Exit SiteManager.
Continue to Step 4: Post Migration.
Can we improve this topic?