Application Server Configuration
This topic is intended for new implementations or major version upgrades of a CM4D Server. The following steps are some of the primary configuration steps for the server hosting the CM4D applications, before and after running the CM4D installer(s).
Pre-Installation Configuration
This section includes some of the configuration steps to be completed before installing CM4D Server.
CM4D Service User
Create a Windows user to run the CM4D Services:
- Go to Computer Management > System Tools > Local Users and Groups > Users.
- Right-click in the Users window and select New User.
- In the New User dialog:
- Enter a User name (for example, cm4dervice).
- Enter the Full name (for example, CM4D Service).
- Enter a Description (optional).
- Enter a strong Password and Confirm Password.
- Uncheck 'User must change password at next logon'.
- Check User cannot change password.
- Check Password never expires.
- Click Create.
- Click Close.
- Right-click on the user you just created and select Properties.
- Select the Member Of tab.
- Click Add.
- Enter the object name for your administrators group (typically, Administrators) and click Check Names.
- If the correct account is found, click OK.
- Close Computer Management.
SQL Authentication User
Create a SQL Authentication User in SSMS to access the databases (as needed; Windows Authentication can be used):
- Create a new Login (e.g., cm4duser).
- Select SQL Server authentication.
- Enter a secure Password.
- Confirm password.
- Clear the Enforce password expiration check box.
- For the Default database, select your new Site database (or CM4D database if you are not using a Site).
Start Print Spooler
Check Windows Services to ensure Print Spooler is running. If the service is not running, start the service before installing CM4D.
License CM4D
Run ATS Licensing Server and import the license files that corresponds to the version you are installing.
Refer to the ATS Licensing Server help documentation for instructions.
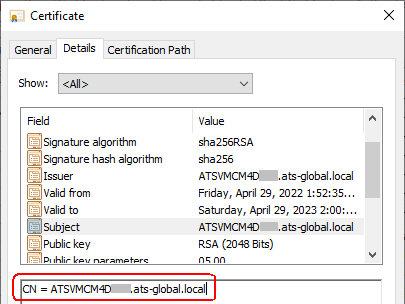
Configure Certificates (Optional)
Using certificates is only required if your SQL Server instance uses a certificate. If SQL Server does not use a certificate, this section can be skipped.
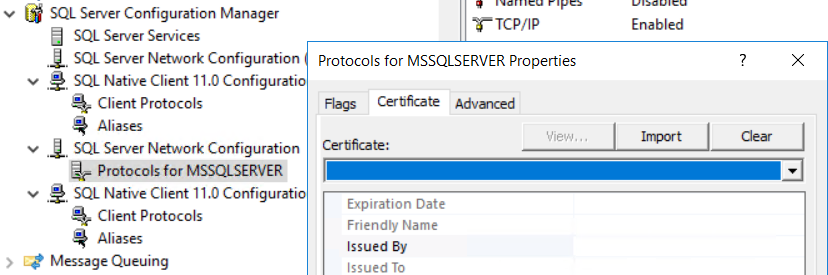
If CM4D is running on a different machine than SQL Server, the SQL Server certificate must also be placed into Trusted Root Certificates on the CM4D Server.
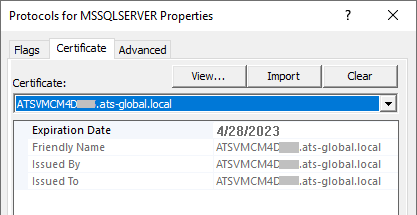
All SQL Server Names across CM4D must use fully qualified domain names (e.g. ATSVMCM4Dxxx.ats-global.local) and must match the "CN=" value of certificate.
Post-Installation Configuration
Once the CM4D Server installer is done and the server has been rebooted, the following tasks may be completed to finish setting up CM4D on the application server.
If you chose the Quick Install method during installation, refer to the topic Quick Install - Manual Configuration before continuing this configuration.
Create CM4D Databases
CM4D requires a few SQL databases to be created and configured for the CM4D software to access. This can be done manually by running the database scripts individually in SSMS or using the CM4D Database Utilities provided in the CM4D install folder.
If the task you selected did not work, the authentication user may have insufficient database privileges. Check the authentication user credentials or try executing the Database Utility using 'Run as administrator'.
See the topic Database Utilities for details.
Site Database
Create new CM4D Site Database:
- Go to the CM4D install folder (.\CM4D\Database Utilities\Site Database Utility) and run ATS.CM4D.SiteDbMigrator.exe.
- Follow the prompts in the console window to create or update the Site database.
- Once the operation is complete, the command window closes automatically.
CM4D Database(s)
Create a new CM4D Database:
- Go to the CM4D install folder (.\CM4D\Database Utilities\Datasource Database Utility) and run ATS.CM4D.DatasourceUtility.Migrator.exe.
- Follow the prompts in the console window to create or update a CM4D database.
- Once the operation is complete, the command window closes automatically.
CM4D Database Connection
Connect to the CM4D Site Database:
- Run DbConnect (as Administrator).
- Connection Type - Change the dropdown to "Site Connection".
- Windows Authentication - Select one of the two available methods of authentication for connecting to the databases:
- Windows Authentication - Set the dropdown to 'True'.
- SQL Authentication - Set the dropdown to 'False'.
- Database User ID - Enter the user name of the SQL user login.
- Database Password - Enter the password for the SQL user.
- Confirm Password - Re-enter the SQL user password.
- Server Name - Enter the name of the database server. If using a Named Instance, include this in the server name.
- Database Name - Enter the name of the CM4D Site database.
- Click Apply.
- Click Test Connection.
- If successful, click OK and continue to the next step.
- If the connection fails on an existing database, check your settings and then test again.
- If the connection fails in a new installation (before the db is created with Database Utilities), this is acceptable; continue to the next step.
- Click OK to exit DbConnect.
Once you have successfully connected to the Site database, copy the CM4D.4ds file from your server to each Client system.
Site Manager Configuration
Set User Database Access and Privileges:
- Run SiteManager. The first time you log in, use the following credentials:
- Username: cm4dsingle
- Password: cm4dsingle
- On the Sites tab, create a New Site and enter in the information you want to enter about this Site database.
- Go to the Managed DataSources tab and create a new Data Source.
- Label - Enter a label; this does not have to match the actual database name.
- Site - If you are using multiple Sites, select one from the dropdown to assign this Managed DataSource to that Site.
- Windows Authentication - Select one of the two available methods of authentication for connecting to the databases:
- Windows Authentication - Set the dropdown to 'True'.
- SQL Authentication - Set the dropdown to 'False'.
- DataBase UserName - Enter the user name of the SQL user login.
- Password - Enter the password for the SQL user.
- Confirm Password - Re-enter the SQL user password.
- Server Name - Enter the name of the database server. If using a Named Instance, include this in the server name.
- Database Name - Enter the name of the CM4D database.
- Click Test DataSource Connection.
- If successful, click OK and continue to the next step.
- If the connection fails on an existing database, check your settings and then test again.
- If the connection fails in a new installation (before the db is created with Database Utilities), this is acceptable; continue to the next step.
- Click Test DataSource Connection.
- Click Save.
- Go to the Users tab.
- Create a new user.
- User Name - Enter the users' Windows ID as the user name (for example, cm4duser or jsmith).
- Full Name - Enter the user name as you want it displayed.
- Password - Enter a password. This is not the Windows password for the user; can be any password.
- Confirm Password - Enter the password again.
- E-Mail Address - Enter an email address for the users that will receive EventSmith notifications.
- Must Change Password - Only set this to Yes if you want a user to log into Site Manager to set their own password.
- Create any additional users.
- Change the password for the cm4dsingle user to something other than the default password.
- Click Save.
- Create a new user.
- Go to the Groups tab and create a new Group.
- Group Name - Enter a name for the group, such as Admin, that is descriptive of the purpose or scope.
- Users - Assign users to the group; click on the Users row 'click to change user list ->' and then click the ellipses button.
- Available Users - Click to select one or more user names to add to the group.
- Selected Users - Highlight users in the Available Users window, then click the left pointing arrow to add the users to the Selected Users list.
- Click OK.
- Access Privileges - Select the check boxes for each Site and CM4D databases you want to grant access to the group.
- Data Privileges - Select the check boxes for the privileges you want to assign to the group. See here for descriptions of the user privileges.
- Go to the Results DataSource tab and enter the required information. No Results Db yet? No Results Db yet?
- Server Name - Enter the name of the database server. If using a named instance include the instance name with the server.
- Database Name - Enter the name of the Results Database.
- Windows Authentication - Select one of the two available methods of authentication for connecting to the databases:
- Windows Authentication - Set the dropdown to 'True'.
- SQL Authentication - Set the dropdown to 'False'.
- DataBase UserName - Enter the user name of the SQL user login; must have the 'dbowner' privilege level in SSMS. This is the login used by Results Database Utility to create/modify the Results database in SQL Server.
- Password - Enter the password for the SQL user.
- Confirm Password - Re-enter the SQL user password.
- Click Test Connection.
- If successful, click OK and continue to the next step.
- If the connection fails on an existing database, check your settings and then test again.
- If the connection fails in a new installation (before the db is created with Database Utilities), this is acceptable; continue to the next step.
- Click Save.
- Go to Settings > EventSmith SMTP Settings menu and configure the following:
- SMTP Host - The server address of the SMTP mail server.
- Port - The port number used to connect to the SMTP mail server. It must match the SMTP port used on your mail server.
- Enable SSL - Check this option only if the mail server requires SSL.
- Username - The username that will be used to log in to Authenticate on the mail server. For anonymous relay, leave this empty.
- Password - The password for the Authentication user name. For anonymous relay, leave this empty. The password is encrypted in the database.
- From Address - The email address from which the event notifications are sent. If this is left empty, EventSmith will attempt to obtain an address from the Site database based on the user running the service. If neither exist, the service will not start. If you are using Authentication, the from address should match the account used to log in to the SMTP server or it will likely fail to send any email.
- Click OK.
- Click Save & Exit.
Create/Update Results Database
- Go to the CM4D install folder (.\CM4D\Database Utilities\Results Database Utility) and run ATS.CM4D.ResultsDatabaseUtility.Migrator.exe.
- Follow the prompts in the console window to create or update the Results database.
- Once the operation is complete, the command window closes automatically.
- Wait for the process to complete.
- When it is finished running, the Command Prompt will read ''Successful migration. Press any key to exit application".
If you created the Results database object before running the Results Database Utility, there are some settings that must be set manually in SQL server. See here for more information.
Firewall Settings
Configure Windows Firewall Rules:
- Open the following Firewall ports:
- TCP 36057 - Client PCs need access to the automation server running Scheduler services to be able to manage Scheduler jobs via Scheduler Manager.
- TCP 8001 - Client PCs need access to the ATS Licensing Server to retrieve CM4D licenses.
- TCP 80 - Web clients need access to the server hosting CM4D Web.
- TCP 1433 - Database servers must allow access to any clients connecting to CM4D databases.
Set SQL User Mapping
Modify the SQL Authentication User (created in SSMS during the Pre-installation steps):
- Select User Mapping.
- Check the boxes next to your CM4D Site database, CM4D database(s) and Results database.
- For each of the databases, set the Database role membership to 'public' and 'db_owner'.
- Click OK.
Configure DataSmith Batch
Create the DataSmith Batch Job configuration DataSmithBatch.settings file (this file must exist before the DataSmith Batch service can start) by creating at least one job:
- Browse to the folder where CM4D is installed. By default, this is C:/Program Files/Applied Tech Systems/CM4D.
- Right click on DataSmithBatchManager.exe and select Run as administrator.
- In the top left of the interface, find the Batch Processor Settings section.
- Click the ellipses following the File Path.
- Browse to a network folder that is accessible to Batch Users.
- Select the folder and click OK.
- Click Make Default.
- In the top left of the interface, find the Batch Processor Settings section.
- Click New to create a job.
- Click Save & Exit.
Configure EventSmith SMTP
- Edit the file ATS.CM4D.DataConnect.Host.exe.config.
- Set the DataConnect service host information:
- <add baseAddress="net.tcp://server98:8523/CM4DDB_Service"/>
- Service Server - Enter the name of the server that is hosting the DataConnect service.
- Service Port - Enter the port number used by the DataConnect host server to connect to the EventSmith host server (it must be the same as the port set in the EventSmith config).
- <add baseAddress="net.tcp://server98:8523/CM4DDB_Service"/>
- Save the config file.
- Set the DataConnect service host information:
- Edit the file ATS.CM4D.EventSmith.SMTP.exe.config.
- Set the EventSmith service host information:
- <endpoint address="net.tcp://server98:8523/CM4DDB_Service" binding="netTcpBinding" bindingConfiguration="NetTcpBinding_ICM4DDB" contract="CM4DDB_ServiceRef.ICM4DDB" name="NetTcpBinding_ICM4DDB">
- Service Host - Enter the name of the server that is hosting the DataConnect service.
- Service Port - Enter the port number used by the EventSmith SMTP client server to connect to the DataConnect host server (it must be the same as the port set in the DataConnect config).
- <endpoint address="net.tcp://server98:8523/CM4DDB_Service" binding="netTcpBinding" bindingConfiguration="NetTcpBinding_ICM4DDB" contract="CM4DDB_ServiceRef.ICM4DDB" name="NetTcpBinding_ICM4DDB">
- Optional - Set the Queue options:
- QueueRefreshSeconds - The time in seconds when the EventSmith queue is checked for entries. The default value is 10; this must be a number between 10 and 86400
- QueueRetrievalSize - The number of EventSmith queue entries picked up each time the queue is refreshed. The default value is 2.
- Optional - Set the Console, Event or File logging levels:
- level - Enter a logging level (OFF, ERROR, INFO, DEBUG).
- Save the config file.
- Set the EventSmith service host information:
Configure a Print Driver
Install and/or Configure one of the two available printer options, either ATS CM4D Printer or eDoc PDF Printer.
Option A - ATS CM4D Printer
Configure CM4D Printer:
- Browse to the CM4D install folder (.\Applied Tech Systems\CM4D).
- Edit the Cm4d.ini file (requires READ/WRITE Administrator privileges).
- In the [default] section find the parameter "PDFPRINTDRIVER".
- Set the value to "ATS CM4D Printer".
- Comment out (#) the other print driver options or delete the unused lines entirely.
- Save and close the Cm4d.ini file.
Option B - eDoc PDF Printer
This option requires a third-party installer and license.
- Run the eDocPrinter PDF Pro installer (as Admin). See here for version requirements.
For eDoc installation instructions, refer to the Iteksoft website.
- Once the installation has completed successfully, run the eDoc PropAdm Tool. <<SECTION: eDocInstall.hts>>
- Open Start > eDocPrinter PDF Pro > PropAdm Tool
- Click Show Property Pages.
- Select the Destination tab.
- In the Save As section:
- For Mode, select Prompt Saveas Dialog.
- For When File Exists, select Replace Directly.
- Uncheck Display SaveAs dialog after print job spooled.
- In the Action section:
- Uncheck Enable Doing Post Action or Launching Viewer after PDF Generation.
- Select Process PDF asynchronously.
- Click OK.
- Change the HKEY_LOCAL_MACHINE dropdown to "Destination".
- Click the Set FlagProhibitHKCU button.
- Click OK to close the PropAdm dialog.
- Browse to the CM4D install folder (.\Applied Tech Systems\CM4D).
- Edit the Cm4d.ini file (requires READ/WRITE Administrator privileges).
- In the [default] section find the parameter "PDFPRINTDRIVER".
- Set the value to "eDocPrinter".
- Comment out (#) the other print driver options or delete the unused lines entirely.
- Save and close the Cm4d.ini file.
- Edit the Cm4d.ini file (requires READ/WRITE Administrator privileges).
Start Services
Start the CM4D Services. If you entered the service user credentials during the installation, you can just skip right to starting all of the CM4D Services. If you are not sure, check the Scheduler *.settings files to confirm the Scheduler and Job users are set.
- Open Control Panel > Administrative Tools > Services.
- Start one of the CM4D services.
- For new installations, the services may not start. If you are using a service user account that has never been granted the Log On As A Service rights, complete the following steps on one service.
- Right-click on the Service and select Properties.
- Go to the Log On tab.
- In the Log on as section, select This account.
- Enter the User credentials for the user account that will run the CM4D service.
- Click OK.
- Click OK on informative message ‘The account … has been granted the Log On As A Service right.’
- Try to start the services again.
- Right-click on the Service and select Properties.
Start any remaining CM4D Services. You may choose to start these services at a later time if you have additional configuration to do for Scheduler or Batch Jobs.
- Scheduler Service
- Scheduler Launcher
- DataSmith Batch
- DataConnect
- EventSmith SMTP
If you are starting the Scheduler or Batch services for the first time, the services will request an Enterprise license from the ATS Licensing Server. You must open ATS Licensing Server Manager in ATS Security and Configuration Manager and approve the license request. Once it is approved, you can retry the Service start.
Continue from here by setting up Scheduler jobs, Batch jobs, Results Rules and creating CM4D templates.
See also:
Can we improve this topic?